
Do you think you have what it takes to learn how to detail a boat like a pro? Of course, you do! Want spunky, spick and span boats? The solution is simple, really: learn from a pro.
Below, I’ve shared boat detailing tips and procedures based on my own experience and other professional detailers’. Summed up, it involves washing, cleaning, then waxing.
Sounds too basic? Not if I throw in a boat detailing secrets I learned from the masters, too!
Table of Contents
- Before Starting, Grab And Gather These Tools
- 7 Easy Steps to Detail a Boat Like a Pro
- Step 1. Use Bleach or Plain Boat Soap for More Thorough Stain and Debris Removal
- Step 2. Brush In Between Rinsing
- Step 3. Pressure Wash the Areas You’ve Brushed
- Step 4. Start Cleaning the Compartments
- Step 5. Time to Get the Buffer Rolling
- Step 6. Wait for the Sealant or Wax to Settle
- Step 7. Buff and Wax the Interior
- Other Waxing Tips To Keep In Mind
- Conclusion
Before Starting, Grab And Gather These Tools
1. For washing/rinsing:
- Pressure washer
- Pump sprayer
- Long-handled brush
- Environment-friendly boat soap or degreaser
- Bleach (only recommended if you’re dealing with severe dirt and mold infestations)
2. For cleaning:
- Clean rag
- At least two towels (the more absorbent, the better)
3. For waxing:
- Rotary buffer or power buffer
- Boat wax or sealant of your choice
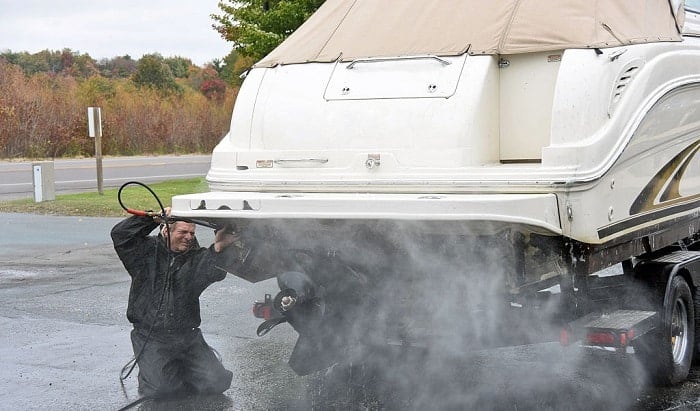
Now, you may be thinking about why I prefer to use a pressure washer and pump sprayer, unlike a lot of other detailers. Well, that’s secret number one for you.
Based on my experience, these two save me plenty of time and effort in the initial washing phase. I’m talking about one to two hours saved on average, so I can safely say it’s not a marginal difference. A pressure washer is a must as well if you’re dealing with an extra mucky and moldy vessel.
Of course, you can always choose to go the usual route of brushing the debris, mold, and dirt off. There are times when a brush or a buffer is necessary, especially when you’re trying to clean hard-to-reach portions of your boat.
7 Easy Steps to Detail a Boat Like a Pro
Here’s a breakdown of my rinsing technique:
- Remove the first layer of dirt by rinsing it with a bleach or boat soap solution using a pump sprayer.
- Wait a few seconds, then brush the rinsed parts with a long-handled brush.
- Pressure wash the soap and any dirt that’s still left.
I seldom depart from this routine because it saves me loads of time and almost always guarantees better results every time. I’ve explained the details below.
Step 1. Use Bleach or Plain Boat Soap for More Thorough Stain and Debris Removal
When rinsing, I tend to use boat soap since it’s specially formulated for boat cleaning. If extreme filth calls for something more potent, then I’m left with no choice but to use bleach.
Ultimately, it’s up to you to decide on what route to take based on the boat’s overall filthiness. When rinsing, start on the topmost parts first.
If the boat’s inordinately moldy, I use at least 25% bleach and 25% boat soap in my pump sprayer filled with water. Paired with the pressure washer, this can blast off most debris and easily remove any persistent mold accumulations.
Step 2. Brush In Between Rinsing
After waiting for a few seconds, use the long-handled brush to scrub stubborn stains. Repeat rinsing and brushing until you’ve gotten most of the debris off.
Check any portion that you may have missed spraying. I recommend you rinse the trailer and its tires, too. As I said before, use a brush on areas you can’t reach with the pressure washer.
A caveat: Always take note of the interior, especially when you’re rinsing tough stains on vinyl. Beware of using bleach on seats that use it, as you may have to rely on a dedicated cleaner when removing them.
Step 3. Pressure Wash the Areas You’ve Brushed
Fairly straightforward step. One other advantage of the pressure washer is that it doesn’t hurt the gel coat.
With a brush, you’ll always need to be mindful of how hard your brush is in order not to damage the gel coat. However, if you think a standard hose will do for this final rinsing, nothing’s wrong with that. It’s your choice.
A tip worth remembering: If you’re dealing with relatively larger and clingier debris like leaves, I advise you to vacuum them first. Blasting the leaves with a pressure washer may only cause them to end up in places you don’t want them on. Worse, they might even get wedged in cracks and crevices you don’t want them in, causing a needless delay.
Step 4. Start Cleaning the Compartments
Any pocket or chamber that didn’t get rinsed, I make sure to clean separately. You can use any degreaser you think is appropriate. I recommend using Purple Power, which I often use to substitute for any boat soap.
The proportions are the same: 25% degreaser and the rest is water.
Spray a rag with the degreaser, then start wiping the inside of the boat’s compartments. I pressure wash the areas I’ve wiped afterward.
After wiping, use a separate towel to dry the compartment, making sure you take out any lingering debris as you do so. It takes time, I admit.
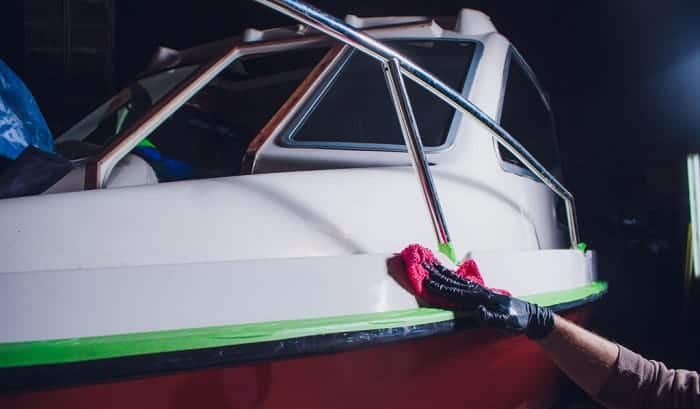
Step 5. Time to Get the Buffer Rolling
Everything from this point onward pertains to waxing the exterior. If you want a sealant recommendation, I highly suggest you try Jescar Power Lock. In longevity alone, it has beaten most of the boat wax I’ve tried in the past, even those made by household brands like West Marine.
Apply the recommended amount of the sealant or wax on the buffer, then start waxing.
When using the buffer, I only stick to one pointer: Let it do the work! Pay attention to how you move it. Slow and steady do the trick from one direction to the other.
Step 6. Wait for the Sealant or Wax to Settle
With the wax or sealant applied, you now only need to wait for it to dry. This takes 30 minutes on average.
Now you can start the last wipe. Using both hands, start mopping two clean, dry towels on the hull that you’ve waxed.
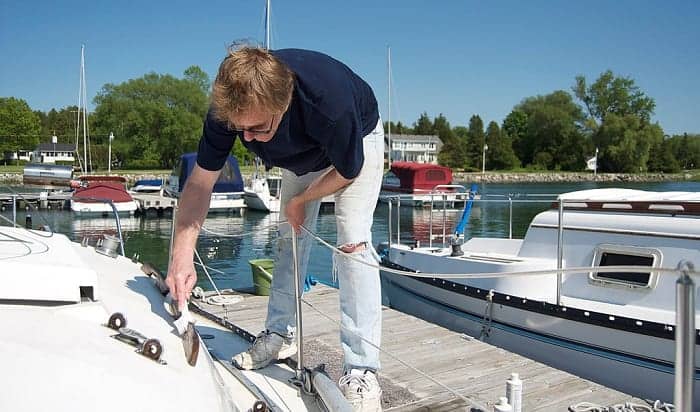
Step 7. Buff and Wax the Interior
With the exterior done, you can now start on the interior, which should have dried completely by now. There’s no difference from the waxing technique I did on the outer parts of the vessel when waxing the inside of the boat.
The lack of space onboard may require you to bend or assume awkward positions when waxing. Don’t worry; you can figure out how to tackle them soon enough.
Just ensure you don’t miss any spots, which is more likely when you’re working on the interior.
Other Waxing Tips To Keep In Mind
- The buffer and foam pad you use play a big role in the results. For one, I typically don’t have to rely on stronger wax or sealants if I use a more aggressive foam pad.
- A heavier foam pad makes it easier to achieve the coveted cutting effect, remove most oxidation and achieve a spotless wax finish.
Since we more than likely aren’t using the same buffer, I can’t make an exact recommendation on what settings to use. The same goes for the foam pad that’s most appropriate for your specific buffer.
That’s why I encourage you to test out combinations yourself. Be creative and come up with what works for you!
If you want a more complete, outstanding guide on how to wax a boat, check out Drake’s Detailing video about it.
I agree with most of his points when it comes to waxing a boat. He’s also a well-known professional boat detailer, so consider any pointers he shares as nothing short of gold nuggets of must-know information.
Conclusion
I hope you’ve found this guide on how to detail a boat like a pro helpful and would consider it as a great reference when considering your boat detailing checklist. Ultimately, these tips are the biggest reason why I’ve built up a loyal client base over the years. If they happen to serve you well, too, please hit me up by telling your story in the comment section!

“I am James Harvey – founder of Boating Basics Online. It is established with the drive to help out first-time boaters, which are those desiring to explore their way through the water. So if you are new to boating, start from here with me. “