
Has your old boat carpet become too worn out? Or perhaps, you’re just not too fond of the way it gathers all that dirt and grime? Whatever your reason is, this guide on how to install boat carpet will give you the steps and answers you need.
It outlines every essential step that considers the various interior layout and deck arrangements of most boats. Ultimately, you’ll need to make your own adjustments while installing boat carpet based on what your specific vessel calls for.
Table of Contents
- Tools to Prepare
- Steps for Any Kind of Boat Carpet Installation
- Step 1: Remove the old carpet and clean the surface thoroughly.
- Step 2: Make the carpet template by measuring or tracing the previous carpet’s shape.
- Step 3: Trace the template’s outline then start cutting the new carpet.
- Step 4: Test the new carpet’s fit, then apply the adhesive.
- Step 5: Stick the carpet to the floor.
- Tips to Choose Boat Carpet
- What is the Best Glue to Stick Down Marine Carpet?
- Conclusion
Tools to Prepare
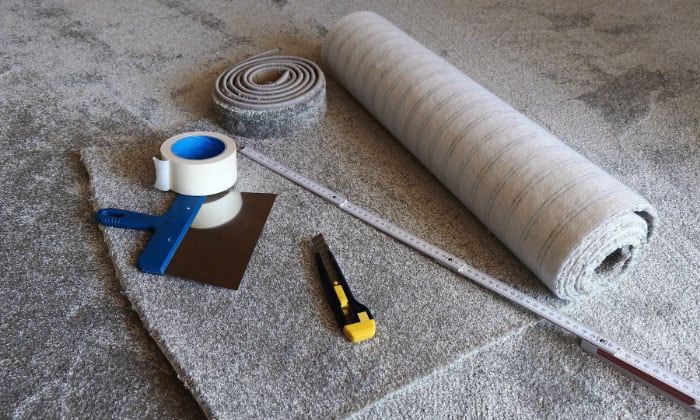
- Boat carpet
- Marine-grade boat carpet adhesive
- Carpet shears or any cutting tool suitable for boat carpets
- Cardboard large enough to accommodate the floor’s size
- Wax and grease remover
- Paintbrush
- Screwdriver (electric or otherwise)
- Vacuum
- Cloth and water for cleaning
- Tape measure
- Straight-edge ruler
- PPEs like gloves and respirators
- Carpet roller (optional)
Obviously, every boat is different, especially how its carpet is laid out and installed. I leave it up to you to find out and decide which other tool(s) works best for your specific situation and requirements.
Steps for Any Kind of Boat Carpet Installation
Before beginning, you can start measuring the old carpet’s dimensions with a tape measure. Take note of every side and edge and list down their exact measurements. This is recommended if you prefer to use the previous carpet as a template for cutting the new one.
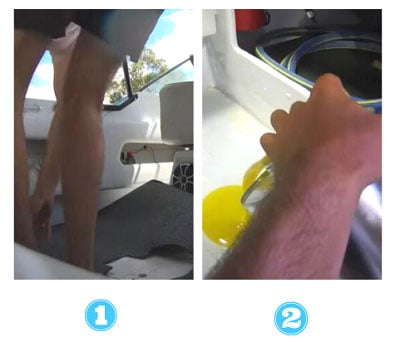
Step 1: Remove the old carpet and clean the surface thoroughly.
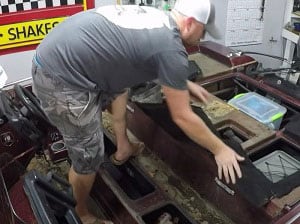
I admit that this first step can be hard or a breeze depending on how your boat’s flooring is laid out.
For example, a couple of bass boats may have floors that also serve as lids for compartments, which are, in turn, part of the entire boat carpet. Chances are, you’ll need to unscrew each “lid” and replace each one with the new carpet of your choosing.
Other vessels are forgiving in that you don’t need to remove and install separate sections of the carpet one by one. Anyway, now you know why most owners choose to rely on professional boat carpet installers, instead.
Once you reach the surface, proceed with the cleaning prep work to make sure that the new layer of adhesive you apply will stick nicely on plywood or whatever flooring you have and to the fresh carpet.
Vacuum any dirt and small debris you see; use the brush for difficult spots.
Now’s also the best time to look for damage as well. If you see any, I encourage you to address it first before you install marine carpet, so you won’t end up dismantling everything all over again.
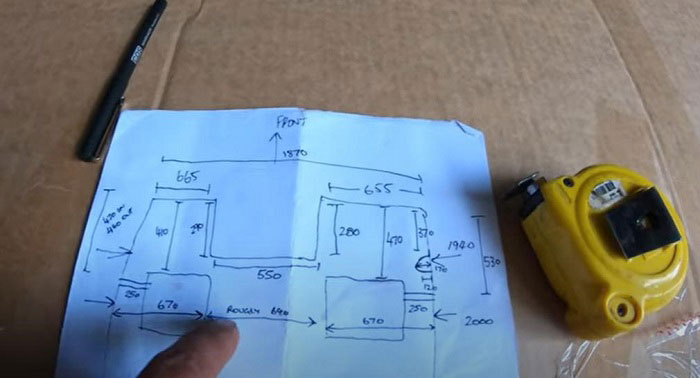
Step 2: Make the carpet template by measuring or tracing the previous carpet’s shape.

Lay out your cardboard in a big enough space. Assuming you followed my advice on measuring the old carpet, it shouldn’t be hard to come up with an outline of the entire layout with the exact measurements on paper.
You’ll basically need to draw that whole outline on the cardboard, using a ruler and the measurements as a guide. Afterward, cut the template and then test out its fit on the boat floor. Make adjustments as needed.
Another course you can take is to simply use the old carpet as a guide. Just lay out the old fabric on the new one, then proceed to trace it with a pencil or pen.
You have to make sure that each piece of the old carpet is properly positioned, though.
The first method takes more time and effort, but you won’t have to worry about wasting a good carpet if you make a mistake.
Step 3: Trace the template’s outline then start cutting the new carpet.
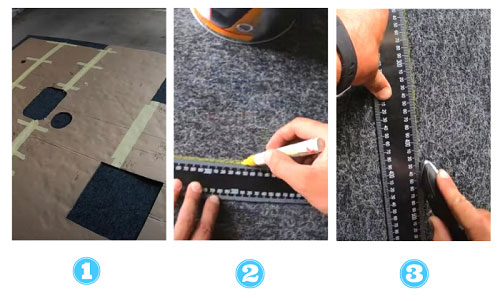
Put the cardboard template over the carpet once you’re sure that it’s correct. Use a sharpie to trace its outline on the carpet.
From here on, it’s a matter of carefully cutting out what you’ve traced on the new boat carpet.
If you decided to trace directly on the new carpet using the old carpet, then you can now also proceed to cut with the shears. Use a straight edge to ensure precise cuts.
Whenever I replace carpet in a boat, I tend to worry about cutting boat carpet corners. I don’t have to deal with that issue at all if I get the exact outline and measurements right, similar to any custom-made snap-in boat carpet.
If you ever find yourself facing this issue, use the tips in this video for effective remedies:
All you have to do is fold the carpet edges according to the shape of the deck, then trim off the excess according to the folded lines.
Step 4: Test the new carpet’s fit, then apply the adhesive.
We’ve now come to the actual marine carpet installation. But, first, make sure that everything you cut out fits the floor perfectly. If there are protuberances, just cut them carefully – but I rarely get this issue if I get my template as precise as possible.
Once you’re ready to put the adhesive on the surface, don’t forget to wear a respirator. Use the grease remover to eliminate any traces of contaminants, if there are any, so that you’ll get no less than the best bond between the floor and carpet.
Put a coat of adhesive on both. Use a brush to spread it evenly, making sure that the entire surface is sufficiently covered. It’s best to apply the adhesive and stick the carpet in sections.
Step 5: Stick the carpet to the floor.

You may need to wait a couple of minutes for the adhesive to become sticky, depending on your product. Once it’s ready, just delicately apply the carpet to the floor.
You can use a carpet roller if you find it helpful, but I find my own hands to be enough to keep the carpet nice and smooth as I lay it. Again, work in sections so you won’t have a hard time positioning yourself.
Tips to Choose Boat Carpet
- Be careful when applying pressure when you install carpet on aluminum boat because, for one, it’s softer than steel. Obviously, you don’t want it to dent.
- If you want your boat carpet replacement to be less of a pain, especially when taking measurements, try looking for a carpet replacement kit that fits your boat’s model instead.
- Once the new carpet is correctly laid out, you can start customizing by adding things that boost aesthetics such as boat carpet graphics or a more practical boat carpet padding to increase its longevity. Both can be attached with adhesive or glue.
- Boaters nowadays are choosing to replace boat carpet with Seadek instead. Many find it more durable, easier to handle, and naturally slip-resistant, among other perks.
- You can also replace carpet in boat with vinyl. It’s low maintenance, doesn’t fade quickly, repels moisture, and tends to have better warranty terms.
- Another alternative if you do not want to replace carpet in a fiberglass boat or on plywood or aluminum floors is Durabak paint.
What is the Best Glue to Stick Down Marine Carpet?
I can personally vouch for the Roberts 6700-0 carpet adhesive, but Henry and RecPro’s offerings are just as great. The Roberts one is my go-to because it works well with most materials (plywood, aluminum, and fiberglass), and it can be readily applied right out of the can.
Conclusion
Did you find this guide on how to install boat carpet good and fairly easy to follow? Here’s basically everything you need to do:
- Take out the old carpet.
- Create the template by using the old carpet or taking exact measurements of the boat’s floor.
- Cut out the shape on the new carpet.
- Apply the glue then stick the new carpet properly.
Overall, you won’t have to deal with the usual hassles if you know your options. Sometimes I skip the DIY boat carpet trim part altogether and just look for the kits as I’ve mentioned.

“My intention from the first day establishing Boating Basics Online is to provide as much help as possible for boaters who want to experience a first safe and convenient trip. So feel free to join us and share your beautiful journeys to the sea!”