
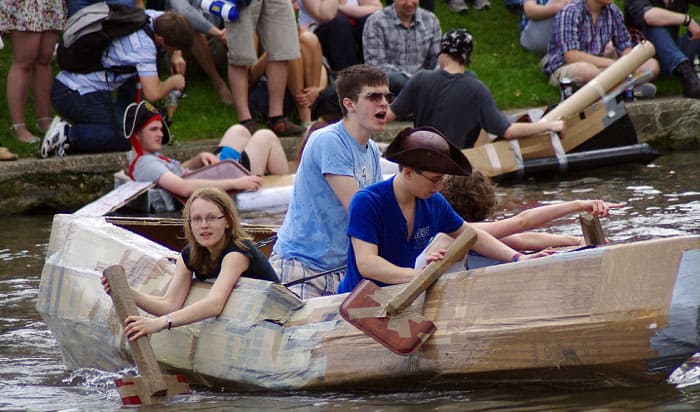
Building your own boat can be a daunting task if done without instructions. Yet, with the right tools and process, DIY cardboard boat building can offer a great experience. It is also a popular group event where people may race the cardboard boats they build themselves.
If you are wondering how to build a cardboard boat, read this short article to get you started. We will cover some cardboard boat ideas for a simple cardboard boat, including building a cardboard boat step by step.
Keep reading to learn more.
What You’ll Need
For this guide, we will only use materials that adhere to standard cardboard boat regatta rules to use cardboard only.
- Cardboard pieces
- Duct tape
- Wood glue
- Pencil
- Razor or knife
- Measuring tape
- Paintbrush
- Glue applicator
- Varnish
- Manila folder
- Scissors
Preparation steps:
- Choose a boat design
There are many sources for choosing simple yet functional boat designs.
It is better to choose a flat hull design instead of a v-hull. Flat-bottom boats have always been more stable compared to v-shaped hulls, and this is especially true for calm waters.
- Determine the boat’s measurements
If you’re using a boat design, you probably won’t need to determine the boat’s dimensions yourself.
The first step is to count the number of passengers and account for their total weight. Consider a few things for the boat’s length; boats shorter than 10 feet are more difficult to steer, but the longer the boat, the harder it is to steer.
For the boat’s height, a number between 10 and 18 inches is a good range that allows enough arm room and clearance for paddling. Standard widths are 20 to 32 inches wide. After determining the dimensions of your boat, it’s time to check its buoyancy to make sure that it doesn’t sink.
- Calculate buoyancy
First, calculate the boat’s volume. Length x Width x Height in feet should give you the boat’s volume in cubic feet. Let’s use a boat sample that is 10 feet long, 24 inches wide, and 18 inches deep. Convert inches to feet.
10 x 2 x 1.5 = 30
With the figure 30 cubic feet, we will determine the positive buoyancy we want. This refers to the waterline and how much of the boat we want sticking out of the water. Having half of the boat out of water is 50 percent so multiply 30 cubic feet by 50%. The more weight on the boat, the more the boat submerges.
30 x 0.5 = 15
Now we take 15 and multiply it by 62.4, this is the weight of 1 cubic foot of water.
15 x 62.4 = 936
936 is the weight needed for half the boat to submerge in the water. Deduct the boat’s total weight, and you get the passenger weight capacity of your boat. If your boat weighs 50 lbs, then the boat’s weight capacity will be 886 lbs.
Steps to Build a Boat
This step-by-step instruction will be a generalized guide for building a DIY cardboard boat. Follow it in conjunction with a detailed boat design of your choosing.
Step 1: Prepare and inspect your materials.
Gather the materials you’ll need and make sure you have enough. It is important to refer to your design to ascertain that you have the proper number of cardboard sheets on hand for cardboard. Some boat designs use double layers of cardboard, so don’t forget to account for that.
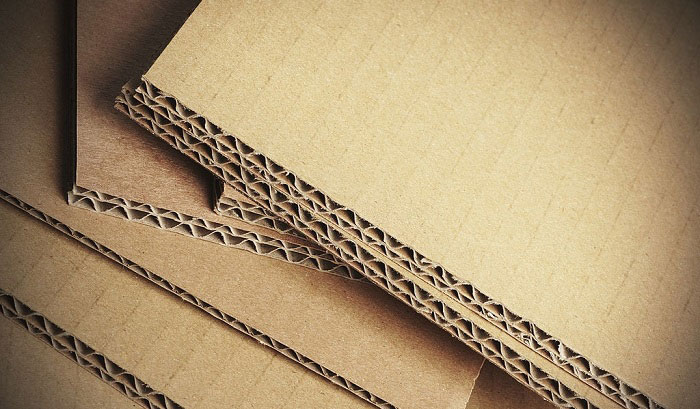
It is very important to inspect your materials properly, especially cardboard. Ensure that your cardboard pieces are in good condition and have not been folded or stepped on. If you are using boxes for appliances or electronics, try to use pieces with as few folds as possible.
Step 2: Build a small scale model to test your design
Before building your cardboard boat, it’s a good idea to make a small cardboard boat to test the design first.
Scale down the measurements of your boat and build a small boat using the same design with a manila folder. Set it on the water with a few rocks to simulate having passengers aboard.
After checking to see that it floats properly, begin building the full-sized boat.
Step 3: Measure and cut your cardboard into larger pieces
Mark your cardboard pieces as necessary. Mark what to cut and what to fold to avoid confusion, and be sure to mark everything down right away. You can also use reference paper or a diagram sheet to trace over and cut the cardboard instead of marking it.
After making the necessary cuts, attach the bigger pieces together using tape, then reinforce them with other materials such as glue or what materials are allowed.
Step 4: Apply the smaller cuts and folds
More complex cardboard boat designs would make use of smaller cuts and folds, usually for inserts that help reinforce the structure of the cardboard boat. Try to keep the number of small cardboard pieces to a minimum; make use of smaller folds and flaps instead. By keeping small pieces attached to a large cardboard piece, the entire structure of the cardboard boat will have better integrity overall.
Step 5: Build the boat structure
Assemble the hull based on your chosen design. Use tape and glue to assemble the pieces but use clamps to hold them together during assembly.
You can use screws to hold pieces together; just make sure to remove them later and patch up the holes.
Some designs make use of a boat skeleton to support the entire boat. Still, in simple designs, pieces of cardboard placed horizontally across the boat serve as support for the boat structure and create compartments. These compartments divide the spaces and also help keep the boat afloat.
Some designs have more compartments to isolate leaks better. Don’t expect your boat to be leakproof, plan for the leaks instead. Finish with the bow and transom.
Step 6: Seal the boat
Now it’s time to seal gaps in the boat. This is where you’ll be using a lot of duct tape to seal any gaps or spaces. You can use sealant if allowed, but duct tape is usually the best option available.
Make sure to seal the edges of the cardboard since water will get into them regardless of whether or not these edges are submerged in water. Pay close attention to the bow, even if your boat design has one that is raised.
If your boat has a top layer, seal it and then attach it to the boat. If you don’t have a top layer, try to reinforce the seal of the top side and the bottom.
Step 7: Make the finishing touches
You can finish up by painting the boat but be careful with the paint and only use one part paint. Otherwise, your boat may not dry. The safer choice would be to use varnish though that limits the decorative aspect of your boat.
Finish by decorating your cardboard boat, but remember to consider the additional weight. If you need to make the paddles yourself, don’t forget to seal the edges for these.
Tips for Building Cardboard Boats
1. Use factory cut ends when putting pieces together
If you are using good-quality cardboard sheets for your boat, the cuts on those pieces of cardboard will probably be precise cuts. It helps keep track of which edges are factory cut ends when attaching cardboard pieces. The precise cuts will mean no gaps or spaces between the cardboard, contributing to the strength of the joined cardboard piece.
2. Prioritize folds over cuts
Having fewer pieces of cardboard will make the cardboard boat stronger and more durable. Minimize the number of cardboard pieces by using folds instead of cutting away pieces of cardboard whenever possible.
Before folding the cardboard, score one side using the blunt end of a knife or razor. Fold along the scoring with the scorched face inside.
3. Practice cuts and folds
Make use of scraps or smaller pieces of cardboard for practice to understand better how to cut and fold properly. Cuts need to be clean, while folds need to have the right pressure applied for both scoring and folding.
4. Make use of accurate measurements
Try to be as accurate as you can with the cardboard measurements, and keep the cuts and folds as precise and clean as possible. Too many measurement errors will make it more challenging to assemble the boat and may even impact performance. While you don’t need to be an expert, make measurements with care.
5. Use a table
The chances are high that this cardboard boat building activity will be done outdoors, but it’s a good idea to use a table, even a makeshift one. Everything from making accurate measurements to proper cuts will benefit from having a proper workspace.
You can make use of a sawhorse, a 2 x 4, and plywood to make a simple work table. There are other makeshift options as well. Whatever you choose, having a table will improve your work efficiency and help you better make a cardboard boat.
Conclusion
Now you have a better idea to build a cardboard boat step by step. While this is not a complete standalone guide, it should help you get a feel for what you need for a better cardboard boat construction.
If you know anyone else wondering how to build a cardboard boat, please share this with them as well. Don’t forget to leave your comments and suggestions below, as we’d love to hear from you.
Read more: Tips to build a plywood boat or your own pontoon boat.

“My intention from the first day establishing Boating Basics Online is to provide as much help as possible for boaters who want to experience a first safe and convenient trip. So feel free to join us and share your beautiful journeys to the sea!”