
There’s always a different sense of satisfaction using something you built with your own hands. Instead of going to a professional plywood boat builder, building a plywood boat yourself and using it will bring a different sense of satisfaction.
In this short guide, we’ll go over the steps on how to build a plywood boat yourself. It’s a worthwhile and valuable experience that any boating enthusiast should experience for themselves. Read on to learn more.
Table of Contents
What You’ll Need
- Marine plywood and wood pieces (as indicated by your boat plan)
- Marine glue
- Epoxy resin
- Fiberglass cloth
- Sandpaper and orbital sander
- Paintbrushes
- Roller
- Painter’s tape
- Saw for wood
- Polish and wax
- Hand polisher
- Fiberglass cloth roll
Steps to Build a Plywood Boat
1. Determine the kind of boat you want
The first step is to plan your boat-building project. Determining the kind of boat you want, such as a plywood fishing boat, will make it much easier to plan everything else. Decide on what body of water you’ll want your boat to traverse, its size, and what you want to have on board.
For your first build, it may be better to consider something that’s not too big, at least until you’re confident enough about your building skills. Just be sure to plan ahead for whatever you can. Don’t stress about covering everything, just plan what you can and things will be easier down the road.
2. Procure a boat building plan
After you’ve determined which boat you want to build, it’s time to procure the materials you’ll be using. For boat building, it’s recommended not to skimp on material quality. But there is one item you should get first.
The first crucial item you’ll need is a boat plan. There are free plans available, but it will be better for you and your project to go with plans from a reputable source. Premium boat plans will detail how to build a wooden boat step by step and are easier to read compared to free plans that could even be outdated.
3. Choose and prepare materials
On top of the list is your plywood, and marine plywood is recommended. For certain parts of the boat such as the hull, marine plywood makes sense. However, it’s a good idea to use marine plywood for the entire boat to save yourself a lot of work and worry.
Marine plywood will make the work easier because you won’t have to cover as much area with resin as marine plywood would have almost no voids. You may even end up spending more if the project ends up requiring more resin than you planned for.
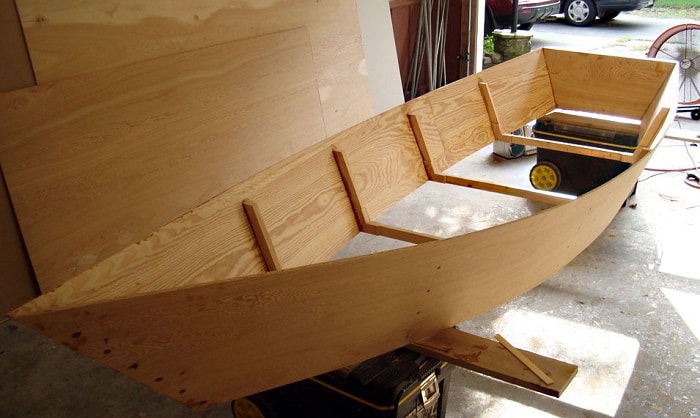
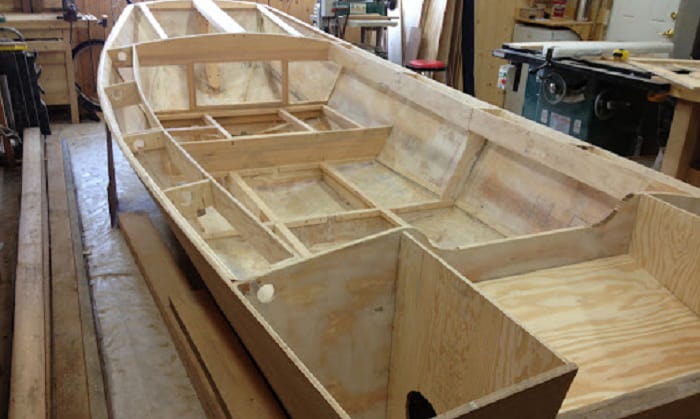
4. Build the boat according to the building plans
Next up, build the boat itself based on the boat plans you procured. If this is your first build, try to stick to the plans as closely as possible. Even small deviations may have implications that you may not be capable of predicting.
Detailed boat plans should also have the necessary amount of materials you’ll need along with measurements for the wood, among other things. Try to review the plans before proceeding with assembly and adjust your plans accordingly.
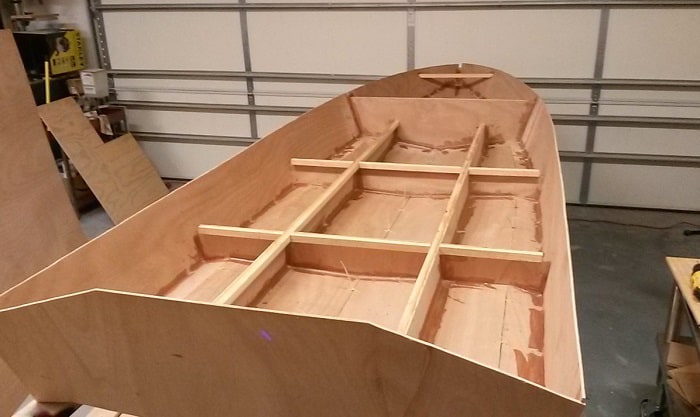
5. Apply epoxy resin
Apply epoxy resin over the entire boat surface. The important thing about applying epoxy resin is to create an entirely smooth surface. If there are any gaps or voids on the wood surface, you will have to fill those in with the resin.
Don’t be afraid to use too much epoxy on voids that have bumps. Gaps are what we absolutely want to avoid. Sand down the surface to smooth everything out. Try to be thorough since imperfections will be noticeable after the project.
Let the resin dry before proceeding to the next step.
6. Lay the fiberglass cloth
Cut the cloth to size and let it relax for a few days before working to ensure that the surface is smooth once finished. After the cloth has relaxed, smooth the surface of the cloth to iron out any wrinkles or creases. You can use your hand or a tool to do the smoothing.
You can use some tape to hold the cloth in place as you smooth it; do this a few times until the cloth is free from wrinkles. This is important to keep the finish consistent. Let the smoothed cloth rest overnight before proceeding to wet the surface.
7. Wet out the fiberglass cloth
Before wetting the fiberglass cloth, give it another run to make sure that the entire surface is level. Use a thin layer of epoxy resin to wet the surface of the cloth. Make sure that the surface is smooth before it dries.
You’ll know that the cloth is applied properly if it becomes transparent and sticks to the boat surface quickly. You can use a roller to even out the surface, but do this while the resin is still wet.
8. Coat with primer
The next step is to paint the boat with fiberglass paint. Applying primer first, around two to three coats should do the trick. Make sure that you apply the primer carefully; a consistent coat is very important for a beautiful finish.
Work in sections so you’ll have enough time to work with the primer. After finishing the first primer coat, let it dry before applying the next coat. After the primer coats, apply your paint of choice and as with the primer, work in smaller sections to make the working time of the paint manageable.
9. Apply boat paint
Apply the paint horizontally using a brush, then go over the painted area with a brush but vertically. This will produce a smooth painted surface, but the key is to be quick about the second brush, which is why working in sections makes great sense.
Paint the whole surface of the boat with emphasis on making the coat as even as you can. I prefer using semi-gloss paint because its finish is hard.
10. Apply boat polish and wax
The final step is to apply polish and wax to the boat’s surface. This will give it that shiny finish that will make your boat look good and also protect it against harsh marine conditions. Try to stick to the instructions provided by your chosen product.
Some products combine polish and wax in one product, and those should be fine to use as well. Just make sure that you do a thorough application of the product to make your boat extra shiny.
Now you’re done. All that’s left is to set out on your own DIY plywood boat.
Read more: Steps to build a fiberglass boat.
Pro Tips
1. Use marine-grade materials
The use of marine-grade materials is recommended to save yourself trouble later on. Since the entire boat is covered in resin, water-proofing is not the biggest benefit of marine-grade materials but they’re there for a sense of security.
It’s said that it’s better to err on the side of caution, and as safety should always be a priority for boating, I think it’s good to consider the use of marine-grade materials if only for safety considerations.
2. Sand every surface
The key to a beautiful boat finish is a smooth and consistent surface. Any gaps or breaks on the boat’s surface are a blemish on what could have been an excellent piece of workmanship. Sanding helps ensure a consistent and smooth finish.
To produce that consistent finish, it is necessary to sand down in between steps. Before and after applying resin on the boat, after each primer coat, and after applying each coat of paint, sanding needs to be done for all of these.
While it may take a lot of work, the result will be the best look you can achieve.
3. Use power tools for more efficiency
While using tools such as an orbital sander or a motorized polisher is not required, they make the work more efficient. Using tools makes the work much easier, which can help bring about an even better result.
Making a homemade plywood boat is time-consuming. Consider using tools, especially if you want to save time.
Conclusion
And that’s how to build a plywood boat. While it may take some time to complete, it’s simpler than many people would think. Hopefully, it will be fulfilling and rewarding to you.
I certainly hope this short guide was helpful to you. Please share it with other people who might find it useful as well. Leave your comments below. We’d love to hear about your thoughts and experiences with your own plywood boat construction project.
Remember to boat safely.

“My intention from the first day establishing Boating Basics Online is to provide as much help as possible for boaters who want to experience a first safe and convenient trip. So feel free to join us and share your beautiful journeys to the sea!”