
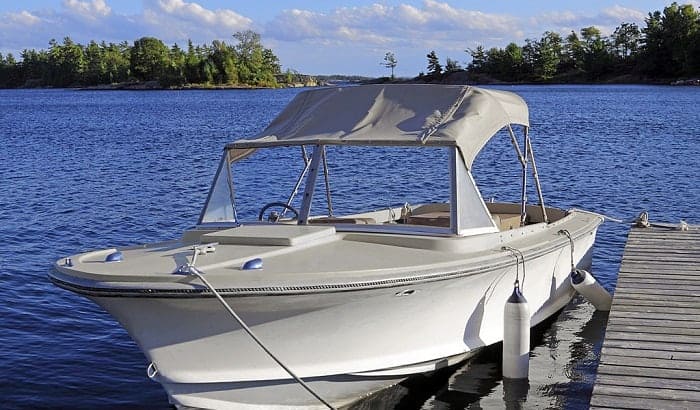
People have used materials such as wood, concrete, bamboo, paper, and leather throughout millennia. But the most renowned contemporary material among the long list of boatbuilding materials is fiberglass.
The exact material that you need in how to build a fiberglass boat construction is glass-reinforced plastic or fiberglass-reinforced plastic. It has a binding nature when mingling with fibrous material. This kind of fiberglass can be stiffened and become solid.
To make a fiberglass boat, you have to prepare a mold for it due to its size. More details will follow for you to finish one. You’re in luck as this article will guide you all the way!
Table of Contents
Processes to Build a Fiberglass Boat
Step 1. Starting with a Mold
A mold is simply the foundation of a DIY fiberglass boat. You may use plywood and some pieces of wood for this. A prefabricated jig to form a hull is essential in this part. The wood is referred to as veneers, and you can glue them together with epoxy resin.
Clear Table Top Epoxy, ProMarine Supplies Art Resin, and Better Boat Epoxy Resin Crystal Clear are dependable marine epoxy resins. The inside and outside of fiberglass are strengthened and protected all at the same time by this substance.
You can make the mold based on the size and shape that you prefer. There are two kinds of mold that are labeled as male and female. Marine fabric is needed in both methods.
- Male Mold
Opting for a male mold would require you to lay over the fiberglass on its exterior surface. The catalyzed liquid resin is essential when the fiberglass goes through saturation.
With this method, the build-up of lamination will happen inside out. Take note that the outermost layer is the last thing to work on. Polishing the outer layer will give you a nice and shiny surface.
- Female Mold
When it comes to female mold, the outermost layer comes first. You can polish the working surface, so you’ll get the shiny finish when the fiberglass is added. In this method, you have to place the fabric on the mold’s interior before wetting it out.
Although there are two kinds of molds, complex hull shapes can be created out of fiberglass. But some shapes are easier than others. Also, don’t forget to inspect all the parts of your mold for any existing flaws.
For instance, you can find a bottom that is a little wavy. You can do some pushing or pulling to make the surface smooth and flat. Some may need to pull thickened epoxy inserted in the middle of zip ties.
It’s uncomplicated to remove the weight once the epoxy is dried. Cut the zip ties to get ready for fiberglass application.
Step 2. Dry Fitting
Dry fitting the fiberglass starts with sanding the boat’s sides and bottom. Leave a ¼ radius on the edges for trouble-free wrapping of fiberglass. The fiberglass should be cut into six inches longer than the shear.
You also need a half-inch or an inch allowance for the widest dimension when cutting the fiberglass. The front side of the fiberglass is usually longer, so trimming is necessary. Using a sharpie and scissors will make things easier.
Be careful when working and avoid abrading or pulling the fiberglass apart. Trimming the hanging excess can be done when curing time is over.
Step 3. Filling the Holes With Epoxy
There will be holes that you have to cover due to the plywood’s seam and zip ties. They must be filled before placing the fiberglass on the mold. So, spare yourself from having additional work like sanding by doing the fillings properly.
Of course, you can let the epoxy dry first then sand it before laying down the fiberglass. Use an old shopping card and mix the thickened epoxy. Next, pull it through in exchange for filling the holes.
Some epoxy may go through, and cleaning the other side is needed after flipping the boat over. There’s nothing to worry about as all holes and even cracks in the boat are packed with resin.
Continue using epoxy to cover the whole boat by using a foam roller or chip brush. It’s a preparation for setting down the fiberglass.
Step 4. Wrapping the Boat with Fiberglass
After applying epoxy to the whole boat, you can carry on with fiberglass application. It’s best to begin on the sides when building fiberglass boats. You’ll see that it sits in a loose position, but whatsoever, you can get back to some areas for fixing to achieve the shape and appearance that you like.
When you finish putting the fiberglass, you’ll find wet areas and some that are not. But you can get a roller or brush to start applying the resin. At this point, all the necessary applications are done. Give it time to become tacky.
You can give it an hour or up to 3 hours. The amount of necessary time varies as it affects the temperature. The curing time becomes quicker when you’re working under high temperatures.
Step 5. Flood Coating on Fairing Filler
In this step, you have to mix epoxy and microlight fairing filler to have the flood coating. The benefit that you can gain from it is you only sand the resin but not including the fiberglass. Just lightly brush the entire hull with the help of a chip brush.
Once this process is done, the fiberglass is also cured. Hence, you can trim the edges and sand them for smoothness. But be attentive not to sand the fiberglass. You can roll the boat over to apply the fiberglass in the interior part.
You still need to add epoxy first, even at the seams, just like what you did with the exterior part. Then you can add the fiberglass. As you can see, these steps are for female mold, which is commonly used.
But nothing is too different when you go for a male mold as you only need to do the steps the other way around. You’ll need to start working on its interior part.
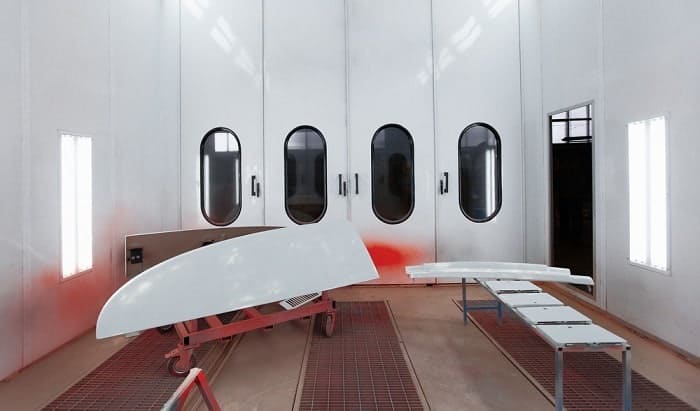
Step 6. Painting Your Boat
When you build a fiberglass boat at home, you have the chance to customize it. However, you may start by using a primer that is two-part-based epoxy. Clean and rinse the newly made boat, then let it dry before you can apply the primer.
Use 36-grit sandpaper to prepare your boat for painting. If you don’t want to use a primer, you may use Xylol instead. You can use any type of paint, but the best option is the two-part polyurethane due to gloss retention and durability. Protect the painted hull while it’s being dried from tiny particles and bugs.
Take Away
It may take time and effort when you commit to a DIY project. Learning how to build a fiberglass boat is an example. But it’s worth it as you’ll be able to form any hull shape out of fiberglass.
Fiberglass boats are common nowadays, and choosing this material is not just jumping on the bandwagon. Most boaters depend on it as it’s tough and easy to repair with more advantages as it has low cost and maintenance. So I hope this article has helped you out; and if you find this article useful, feel free to share it to those who may need this.

“I am James Harvey – founder of Boating Basics Online. It is established with the drive to help out first-time boaters, which are those desiring to explore their way through the water. So if you are new to boating, start from here with me. “