
Steps for building your pontoon boat
- Prepare the materials
- Seal the plastic barrels
- Build the frame for the deck
- Complete the deck
- Apply a protective coat to assembled deck
- Line up the barrels
- Secure the barrels in place with hanger irons
- Apply finishing touches
Pontoon boats are the very image of relaxation. However, a leisurely boat trip can be costly due to the prices of commercially available pontoon boats. Whether you’re looking for something more economical or you just want to try a new building project, building your own pontoon boat is a good idea to consider.
In this article, we’ll go over how to build your own pontoon boat using a basic homemade pontoon boat design. We’ll also go over some sensible additions to consider for our pontoon boat.
Keep reading to learn more.
Table of Contents
What You’ll Need

- Marine plywood 2 x 2 feet; 4 – 6 pieces
- Marine plywood 2 x 6 feet; 4 pieces
- Marine plywood 2 x 4; 4 – 6 pieces
- Wood glue
- Galvanized screws for deck assembly
- Galvanized hanger iron
- Plastic barrels with cap; 6 to 10 depending on desired boat length
- Sealant for barrels
- Protective coat for the deck
- Circular saw
- Cordless drill for screws
- Brush or glue applicator
- Brush or applicator for the protective coating
About Materials
Prepare the wood by measuring and cutting 4 pieces of 2 x 6’ wood. 2 pieces should be the intended length of your pontoon boat, around 10 to 12 feet long, while the other 2 pieces should be the desired width for the boat around 6 to 8 feet. The length of the deck should be longer than one side of your barrels lined up.
Since this will serve as the deck floor, it is preferable to make use of thicker pieces of plywood compared to thinner ones, even if you intend to stack sheets together. However, marine plywood is a must as non-treated wood will not last due to constant exposure to water. If you do make use of thinner plywood, glue the sheets together first before attaching them to the deck frame.
Sealant for the plastic barrels can be any standard sealants against leaks, such as caulk. As for the protective coat of the assembled deck, sealing the entire structure using standard means such as with fiberglass will be tricky due to the resulting weight. Make use of an alternative to fiberglass resin; something that is more lightweight is preferable.
For any materials made with metal, make sure that they are for marine use as these will be exposed to water and moisture, resulting in corrosion. It is especially important to ensure that proper hanger irons and screws are used to keep the pontoon boat’s structure secure.
About the Boat Design
While there are available sources for more complex and intricate DIY pontoon boat ideas, we will make use of a simple design for this guide. The things discussed in this guide may still apply to other designs, but in case of conflicting details, feel free to follow the more detailed instructions of your own pontoon boat design to ensure the integrity of your boat’s structure.
Pontoon Boat Assembly – Steps
Step 1. Prepare your materials
Prepare all materials before starting the construction of the boat. Cut all pieces of wood into the necessary length. For the 2 x 6s, cut the ends at a 45-degree angle. The 4 pieces of 2 x 6s should fit nicely and be able to create a rectangular frame.
Next, prepare the plywood by measuring the size to cover the deck floor. The plywood does not have to be one whole piece of wood, but it does help to have fewer pieces. Remember to take the design you’ll be using into consideration when cutting.
Step 2. Seal the plastic barrels
First, check to see if there are any leaks on the barrel; one way to do this is to fill it with water up to around 30% capacity. Roll it around to see if any water is leaking and take note of all leaks. Empty the barrels and allow them to dry.
Once the barrels are dry, put the caps on and use sealant to close any gaps in the barrel. Seal the caps and any leaks on the barrel. This will ensure that no water is able to get into the barrel and will keep the barrel afloat.
Step 3. Build the deck frame
Assemble the outer frame with the 2 x 6 pieces using glue, then fasten with screws. Attach the longer pieces of wood that run along the length of the frame. These not only serve as vertical braces that will support the deck structure, but they will also help keep the barrels in place.
Attach the shorter bracings that will give the deck frame more strength and stability. You can place shorter pieces of wood between the outer frame and the vertical brace in between barrels, just account for the barrels’ placements.
Step 4. Complete the deck with flooring
The next step is to attach the plywood which will serve as the deck floor. Make sure to line up the edges of the plywood to the frame and trim down any excess.
It’s a good idea to leave a notch at the rear end of the deck, which will be for attaching an engine or motor. You don’t have to mount the engine on the frame itself, but doing so does two things: it is more secure compared to mounting it on something else, and this makes it easier to allow the propeller to reach deeper into the water.
Step 5. Apply a protective coat to the deck
Regardless of whether you’re using paint or resin for the deck, make sure to coat everything evenly. Missing spots will contribute to the deck structure collapsing sooner. If it’s made of wood, it needs to be coated.
Due to the need for coating the whole deck, the protective coat needs to be applied before attaching the barrels. If you’re worried about the screws used for fixing the barrels in place, use sealant on the screws to seal the spots up nicely. Dry the coating before continuing.
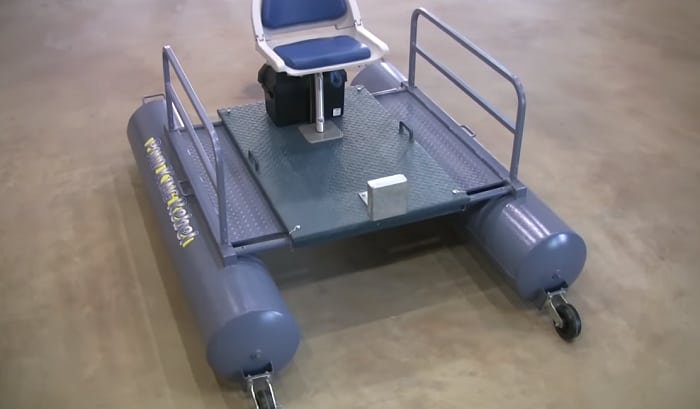
Step 6. Place the barrels by lining them up on the deck frame
Turn the assembled deck upside down with the deck floor against your working surface. Place the barrels on the deck frame by lining up an even number of barrels on each side of the frame. The barrels should be placed between the outer frame and the vertical brace, settling nicely into the space between.
The barrels don’t have to be lined up mimicking a commercial pontoon, you can have spaces between them if you’d like. Don’t forget to account for a nose cone for your barrels if you’d like something to help cut through the water.
Step 7. Fix the barrels in place
We’ll use the hanger iron to fix them in place, similar to how pipes are secured in place. Screw down the hanger iron on one side of the deck frame, the outer frame for instance, then go over the barrel reaching the vertical brace at the other side of the barrel. Tighten the hanger iron over the barrel before screwing the other side in place, then cut it.
Repeat the process with the hanger iron for every barrel, one for the top and one for the bottom side. You can add one or two more hanger irons per barrel if necessary.
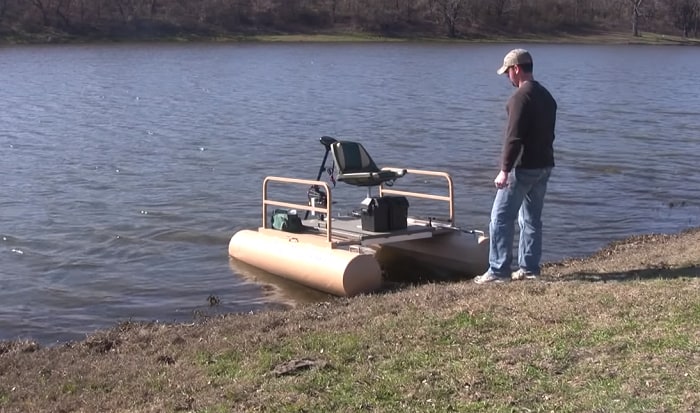
Step 8. Finishing touches
After fixing the barrels in place, the basic pontoon boat is finished. All that’s left is to install whatever you’d like on the deck. Since the customizability of a pontoon boat is one of its biggest advantages, you could say that you’re only getting started.
Possible Additions to the Boat
1. Deck border or fence
A border or fence on the pontoon boat will help keep things and people on the deck. The installation will be simple regardless of whether you’re making your own fence out of wood or installing something made of metal. Make use of the outer frame for screwing or nailing the fence down.
2. Nose cone
The nose cone on a pontoon boat cuts through and diverts water, much like the front end of a boat’s hull. This helps give the boat better performance, but it may not be necessary, especially if you plan to keep a leisurely pace all the time. Since it does look better to have on, it’s a good idea to explore installing one if it suits your taste.
3. Seats
Installing seats is a very good idea and is the least optional item on this list. While you can just bring chairs onto the deck, installed seats will be more secure and are safer. This is especially helpful for anyone who will helm the boat, whether with a wheel or a tiller.
When installing seats, you need to be aware of where your 2 x 4s are. Make use of the outer frame or the 2 x 4s serving as bracing for the frame. Otherwise, you will screw into just the plywood and the plywood will not be thick enough to support the screw and hold the seat down.
4. Outboard engine or trolling motor
Without an engine, you will be left with paddling to move your pontoon boat on the water. Mount the engine at the rear of the deck, but be mindful of the barrels as the propeller may end up hitting one of the rear ones. Leave enough clearance for safety.
5. Boat wheel
This will be one of the more complicated things you can install on the boat, and I don’t recommend trying this out if you’re not confident about it. You will need to install a base or a console for the wheel and keep the wires or cable neat and tucked away.
Conclusion
Now you have a better idea of how to make your own pontoon boat. One of the biggest appeals of pontoon boats is being able to add what you want to them, so think hard about what you’d like onboard. Just be sure to account for the additional weight.
If you know anyone else wondering how to build your own pontoon boat, consider sharing this article with them. It’s good to discuss your ideas with other people, maybe you’ll come up with even better ideas together. Also, please leave your comments and suggestions below.
Remember to boat safely.
Read more:

“My intention from the first day establishing Boating Basics Online is to provide as much help as possible for boaters who want to experience a first safe and convenient trip. So feel free to join us and share your beautiful journeys to the sea!”