
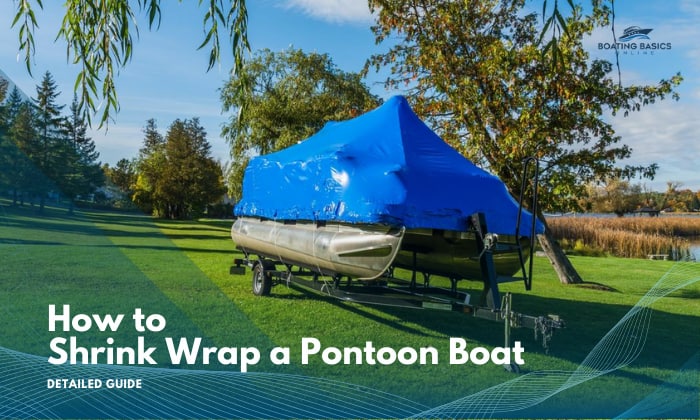
Every year, we all have to wrap a boat for winter to keep it protected while in storage. I totally get why you want to go DIY shrink wrap boat route, especially if you want to run a tight ship this year or just don’t mind not relying on others for it.
This guide for how to shrink wrap a pontoon boat will explain the steps that work yearly for me and give me peace of mind that my vessel stays hitch-free for next season.
Table of Contents
- Prepare These Tools
- Safety Considerations
- Steps to Shrink Wrap a Pontoon Boat
- Step 1. Prepare your pontoon for storage
- Step 2. Build the support structure
- Step 3. Install the strapping system
- Step 4. Build the substructure for the strapping
- Step 5. Put the shrink wrap over the pontoon boat
- Step 6. Put the perimeter band around the vessel
- Step 7. Start shrinking
- Step 8. Install the vents
- Conclusion
Prepare These Tools
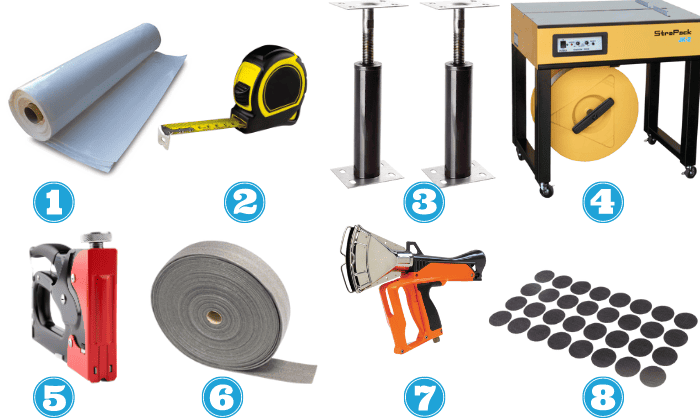
- Right-sized shrink wrap
- Measuring tape
- Support posts
- Strapping system
- Staple gun
- Perimeter band
- Heat tool (torch or propane gun)
- Self-adhesive vents
A tip: To skip having to buy most of these materials one by one, consider buying a boat shrink wrap kit. These kits will provide you with the shrink wrap along with essentials like the heating tool, straps, support, cutters, and even the vets.
Safety Considerations
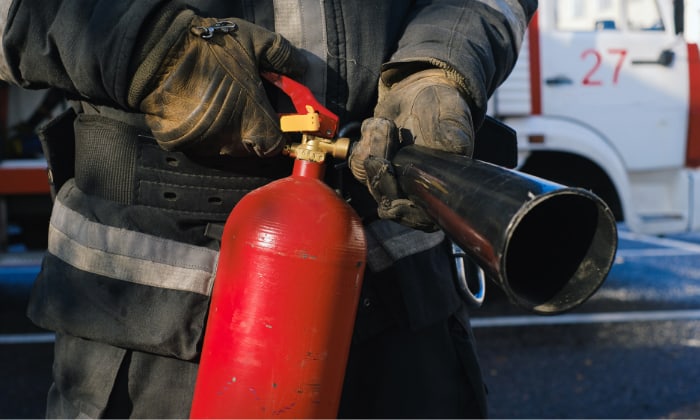
This process requires the use of a heating tool like a heat gun or propane torch, which obviously carries a fire risk. I recommend strictly following the instructions for the proper use of the specific tool you’re using.
It also won’t hurt to keep a fire extinguisher nearby, just in case. Any clothing or gear that can protect you from the heat, such as heat flame-resistant gloves and safety glasses, is also recommended. Lastly, don’t work in a place where there are any flammable materials.
Steps to Shrink Wrap a Pontoon Boat
Step 1. Prepare your pontoon for storage
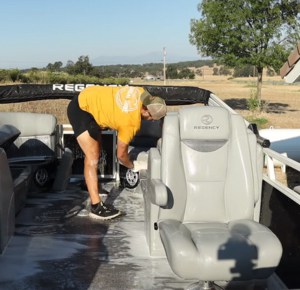
Anything that can be stowed away has to go, from chairs, tables, and other miscellanea you have onboard. Lower the Bimini as flat as possible, so it won’t interfere with the shrink wrap’s full coverage and protection of the watercraft.
If you have time, do a thorough clean of the boat, inside and out, too—this curbs mold and mildew. If not, at least get rid of all the food crumbs to avoid attracting pests.
Step 2. Build the support structure
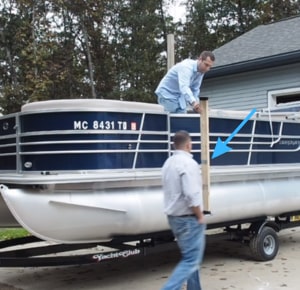
Next, measure the highest points on the pontoon. You have to adjust your measurement to accommodate the height of the support posts. Oftentimes, I just add an additional 15 inches.
You’ll also have to account for your pontoon boat’s length when determining the number of support posts you need. The recommendation is one post for every 8 feet of pontoon length. As such, an average 21-foot boat will only require two supports.
Done? Now you can cut the two support posts with your height measurement as a guide. Attach a bottom and top cap to each one.
- I’ve tried 2×2 wood and PVC pipes and have found that nothing beats the sturdiness of a proper shrink wrap support.
Of course, you can always use wood and PVC pipes as a substitute if you figure out a stable setup or shape using them. I’ve used PVC with a >—< shape, and it has worked for me in the past. Do what works best for you!
Step 3. Install the strapping system

Properly shrink wrapping a pontoon boat involves making sure the wrapping stays in place and keeps the boat protected. Before beginning, look for anchor points you can use for the strapping. Normally, I just use the top rails on the gunwales.
Tie the strapping to the port and starboard sides to secure each support post nearest to either one. Fasten the strapping to the top rails, making sure it’s stretched to the maximum or pulled taut over the support posts. As you do this, try to keep the posts level and equidistant from one another all the time.
Grab the staple gun and use it to secure the strapping to the top of either support post. Test the tension. It shouldn’t be sagging in any way to give you a good sign that it’s going to maintain its structure.
Step 4. Build the substructure for the strapping
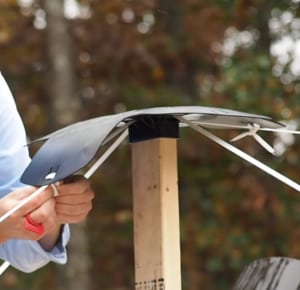
This time around, you’ll be working on the strapping for the bow and stern sides, which will act as the substructure. I just use the cleats on either side to create the “V” pattern similar to the one I shared above.
You’ll need to attach a strapping on the tip of each V to pull it as tautly as possible toward the nearest support post. Afterward, staple it onto the post’s top.
Keep the setup stable, i.e., has the right tension, by securing the portion of the strapping in the middle with a buckle. Don’t forget to tape over it to keep it from getting scorched once you begin shrinking.
Step 5. Put the shrink wrap over the pontoon boat
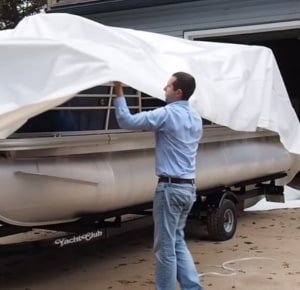
You can now start draping the shrink wrap, preferably starting from the stern and then moving toward the bow. Just make sure the entire boat is fully covered. Any excess shrink wrap should be cut once you’re sure that the entire vessel has been completely enveloped.
Step 6. Put the perimeter band around the vessel
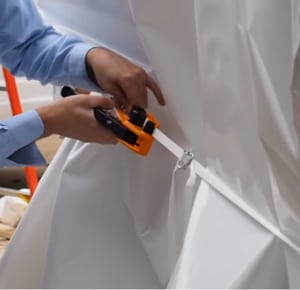
This is only to keep the shrink wrap in place. Just run the band around the boat’s entire perimeter, just under the deck.
I’m going to assume you’re wrapping it while it’s on its trailer. If that’s the case, cover the winch using a buckle strap tensioning tool. Once done, connect the band’s two ends at the stern and tension it correctly.
Step 7. Start shrinking
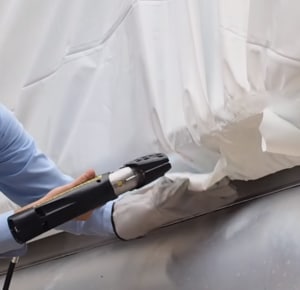
Use the heating tool to start shrinking. Create a weld at the perimeter band, then carefully fold the wrap over the band.
Begin shrinking by applying even strokes using the heating tool. Start from the lower portion, then slowly move up. Be mindful of overheating the wrap to the point that you’ll damage it (and have to start over!)
Tape the seams that will be created along the cover once you’re done. Use the shrink tape to keep it sealed and for the whole wrap to become more stable.
Step 8. Install the vents
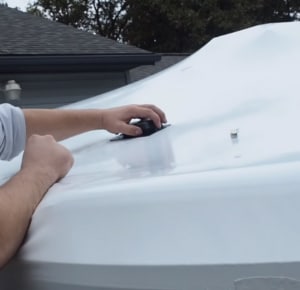
Pontoon boat storage solutions never forget to remind folks to maintain airflow while any vessel is in storage. After all, this always keeps you one step ahead of moisture buildup and mold growth.
Peel off the self-adhesive backer of the vents and position them correctly on the cover. Cut the shrink wrap at the base and snap the cover to the base, which should be enough to allow optimal airflow and ventilation inside the boat.
And you’re done! If you follow every step to a tee, I assure you that you will always avoid the needless cost of shrink wrapping a boat every time winter rolls in.
Conclusion
Now that you know how to shrink wrap a pontoon boat, you should have fewer qualms about deciding whether you’ll store a pontoon boat in the winter outdoors. Overall, the qualities that make a great setup different from an average one are solid support posts, a stable and sound strapping structure, and optimal ventilation.
Feel free to introduce your own twists to this method because, in the end, that’s the only way for you to end up with the most ideal setup.

“My intention from the first day establishing Boating Basics Online is to provide as much help as possible for boaters who want to experience a first safe and convenient trip. So feel free to join us and share your beautiful journeys to the sea!”