
If you’ve been meaning to learn how to tie up a boat in the best way possible, you’ll have to be aware of the most reliable boat tying methods. How your dock is set up also always forms part of the equation. On the whole, tying to dock cleats is the most recommended since they’re designed to
It won’t hurt to learn how to tie up your boat to pilings and rings found on docks even if there are no cleats around. I’ve also shared some tips on how to tie a boat up in various situations (e.g. tying up against the seawall or using only the bulkhead).
Table of Contents
Things You’ll Need To Tie Up A Boat
- Bow line, stern line, as well as the forward and aft spring lines
- Boat cleats
- Fenders
The mooring gear you need will remain the same regardless of the setup of the dock. Obviously, you’ll need dock lines for tying up a boat.
A quick tip: Nothing tops nylon rope when it comes to strength so be sure to use only that.
If there are no cleats for fenders on the side of your boat, you can always buy and attach them using the appropriate backing plates and bolts.
If there are no dock cleats but pilings or rings instead, know that how you tie your vessel to them mainly depends on how they’re designed. With all things considered, I can’t really favor any boat rope tie down method over another since every dock is different.
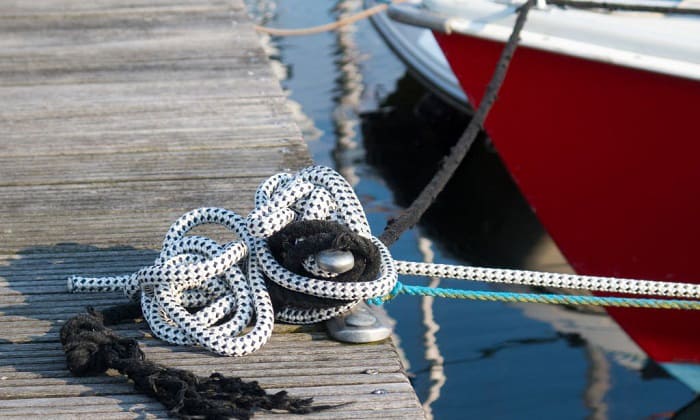
Tying Up Using Cleats
Optimally, there should be cleats both on the dock and the boat for tying up to be a breeze. If this is the case, I almost always prefer to use a different but no less solid cleat hitch that takes only a few steps to do and just as easy to disengage if the need arises. These steps are assuming you’ve properly positioned your boat on the dock and it’s ready to be tied. Here’s the simple two-step procedure:
1. Attach the rope to the backside of the cleat then wrap the line over your hand.
The angle of the rope should be in such a way that you loop it first on the cleat’s backside, entering from below. Afterward, wrap the run of the rope around your other hand that’s free. Just one wrap of the line will do since you’ll be using it to loop on the cleat’s front side.
2. Loop it on the front side then loop it again on the backside.
Use your hand with the rope wrapped around it to loop the line on the cleat’s front side. Pull it till secure. Once that’s done, wrap the rope’s run again on your free hand then loop it on the backside this time. Pull to secure. Oftentimes, that is enough, but feel free to make more loops if you want a stronger hold.
Take note that you can perform these cleat hitches on all your docking lines, may they be bow lines, spring lines, or stern lines. I suggest you make use of all these lines every chance you get. Please use this tying a boat to a dock diagram as a visual reference of the standard setup:
A & B are the bow lines, E & F the stern lines, while C & D are the spring lines. The latter lines are the most important when tying up any boat since they’re going to prevent the boat from rubbing against the dock and hitting things in front of it or behind. X& Y are the fenders, by the way, which serve another protective purpose.
You can forgo crossing the stern lines if your engines are, for example, on a bracket and could get fouled in the lines.
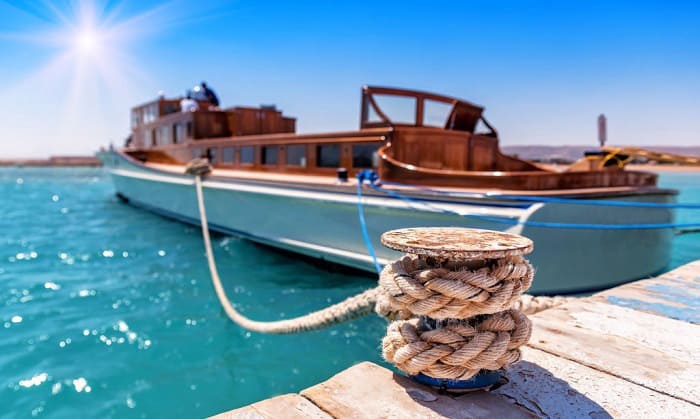
Tying Up With No Cleats
Follow these steps if there are no cleats found on the dock you’ll be mooring in. Both these methods can hold my vessel steady, especially when I need to tie a boat to a dock overnight with zero cleats present.
Pilings
- First, tie the line to the boat cleat. A standard cleat loop or hitch (i.e. going around both horns of the cleat) will do since cleats are designed for convenient yet stable tying in the first place.
- Then, do the boat knot dock on the piling. Do this by looping the rope over the piling one time, then loop it around again for a second time.
- The run of the line should then be looped around the line that’s attached to the boat. You’ll basically be doing two half hitch knots on it to keep the line nice and snug. For a better reference on how to do this, please watch this video:
Rings
- Take the ring then put a little bit of the rope (not the end) through it to form an arch.
- Next, take the loose end then go through the arch you created then pull out enough to loop it around the line next to the ring or going to the boat. Perform that loop twice then pull until snug.
Tips on Ways To Tie Up A Boat Based On Various Situations
The variety in marine conditions and settings complicates the process of tying up vessels. Here are a few tips I’ve shared based on specific situations you may face when mooring.
1. Tying Up Against the Seawall or in Rough Water
Whenever I need to tie a boat to a dock in rough water, I make sure my spring lines are properly tied and fenders are in properly in place is enough to lessen the impact of rough water. To be prudent, I’ll opt to use mooring whips as a boat tie off to make sure that it will always be at a safe distance from the dock or seawall and to reduce the impact of waves on it as well.
2. Tying Up with Only a Bulkhead
I admit that I’ve never had to do this before. However, if you happen to want to know how to do this, I suggest you head over to this insightful discussion in the Hull Truth forum. You’ll get plenty of tips there.
Conclusion
So how’d you like my little tutorial on how to tie up a boat? Again, these methods are crucial for any boat owner because you’ll never know when you’ll have to tie up a boat with limited tools on hand. If you want to share your thoughts and feedback, please leave a comment below!

“My intention from the first day establishing Boating Basics Online is to provide as much help as possible for boaters who want to experience a first safe and convenient trip. So feel free to join us and share your beautiful journeys to the sea!”