

You can learn how to rewire a boat trailer lights on your own by following its electrical diagram or sketch. The process is easy and quick to do when you know it step-by-step, and have done the needed preparations well.
Rewiring a boat trailer’s lights requires you to know the functions of the light wiring assembly. Correctly rewiring the boat trailer lights ensures it’s fully functional, safe, and prevents damage in transporting a boat.
Read on to find boat trailer lights rewiring tips from boating experts to learn more.
Table of Contents
Step-By-Step Guide to Rewire a Boat Trailer
What To Prepare?
Tools and materials required in rewiring your boat trailer:
- Trailer wiring sketch or diagram
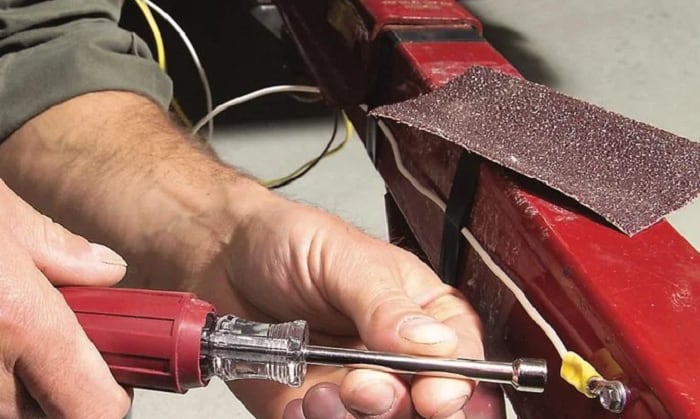
- Small tools: a 4-in-1 screwdriver, continuity tester, nut driver, jumper wire, and towing car tester
- Wiring supplies and kit, replacement light bulbs, electrical cleaner, 220-grit sandpaper, and cutter
- Bubble level and measuring tape
4 Simple Steps For Rewiring A Boat Trailer Lights
Step 1: Place The Boat Trailer In A Secure Location
Ensure the boat trailer is in a secured place to safely prepare everything before rewiring a boat trailer. Consider these preparatory steps:
- Place wooden, concrete blocks, and other solid slabs on the front and rear sides of the boat trailer tires
- Use a support beam, stands, and portable jack boat lift to hold the trailer firmly. The use of bunk boards is also a great idea to secure the trailer frame to the ground.
- Use a bubble or high-precision laser level and jack lift to level the trailer for easy and safe rewiring tasks
- Lock the trailer ball into the trailer coupling. Make sure you avoid any drop or rise in height measurement so there will be no effects on the electrical grounds.
Look through your marine maintenance kit or boating supply regiment and get an idea of how to use them without professional help.
Step 2: Check Everything is On Hand
Check that everything is on hand and do some thorough checks depending on your boat trailer rewiring needs:
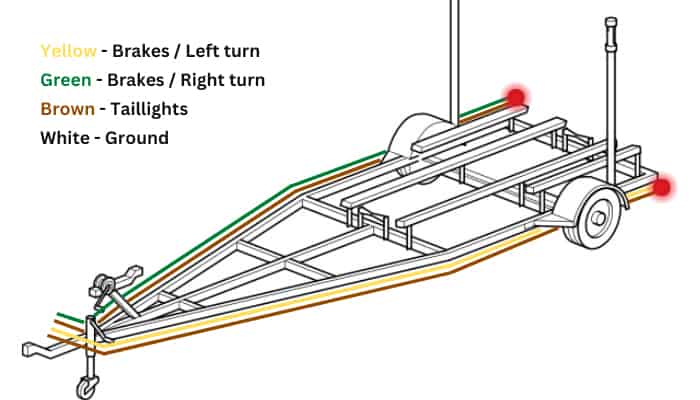
- Review your trailer’s wiring sketch or diagram for the right color codes and correct installation of the new wire mountings. Check the back of your trailer’s lighting assembly to configure the wiring system. The two-wire system will come easy, and the three-wire will have one more wire for the ground.
- Pull out all of the old boat trailer wirings and lightings to reroute your new wire mounting harness. You can unbolt the hardware and lighting attachments from the trailer frame and cut the lighting wires for easy retrieval.
- Start unclipping the old wiring off the boat trailer from the back to the front sections of the frame. Once you are done, easily pull out the wiring from the front of the trailer frame within the tongue section.
- Pass the harness through the boat trailer frame (and key hotels) to carefully layout the new wires and lighting installation.
- Layout the new wire mountings, including the light connections as shown on your wiring sketch or diagram.
Step 3: Do The Rewiring Process
- Mount the electrical ground wire first for safety purposes and check that it works for the marine trailer and tow vehicle. Usually, boat trailers have 3 light wirings – running lights, another for signal (turn and brake) lights, and a ground wire. Note that the black wire is for running lights, red wire is for signal lights, and white wire is for the ground.
- Pull the new wires following the wiring diagram or sketch you’ve made. Old wires are useful if you need to pass through any enclosed portion of the trailer frame or tongue.
- Install the marker lights before you clip the new wires onto the trailer frame for safe towing and travel direction.
- While rewiring, you can install new trailer lights, including taillights and replacement bulbs. Make sure you use waterproof connectors, especially on the boat trailer sections that submerge in water.
- Look for other references or the best way to wire a boat trailer and backtrack every connection to ensure serviceability.
This step-by-step video can help you replace your wiring easily and quickly.
Step 4: Test Your Trailer Wiring Connections
Check and test your marine trailer wire and electrical ground to prevent common grounding issues. Start with examining the grounding location. It should be free of interfering objects, paints, and other debris. Other than that, check that:
- There is good ground connection between the vehicle body and drive train or towing frame
- The electrical ground connects well once the boat trailer is hitched to the vehicle towing frame
- The hitch ball and trailer coupler surfaces are maintained rust-proof even when unused
- The new wire splicing or mountings are good to go to prevent electrical ground issues
Boat Trailer Wiring Helpful Tips
1. Quick Fix Of A Boat Trailer Wiring
Any boat trailer wiring can go wrong when consistently exposed to extreme environments.
- Fix or replace a bad boat trailer wiring connections regularly, before they become worst or even before operating it.
- Rather than using steel connectors, find other connector alternatives in the frame and tongue wiring.
- Avoid using steel wiring connectors or steel pins, especially when the trailer frame goes underwater. Instead, solder and use the heat-shrink tube to enclose wire connections.
Understanding the boat trailer wiring system and reading online wiring tips or resources can help you fix wiring connection flaws quickly.
2. Cleaning Light Wiring Connectors
Clean your boat and boat trailer to upkeep and quickly fix bad wiring connections.
- Start by checking the plug and socket of the trailer lights. See if they are working or not. Check the tow vehicle and trailer frame wiring for electrical problems before switching them on.
- Regularly clean or replace the connector plug when they show signs og wearing off.
- Spray the wiring connector with a special electrical contact cleaner to remove any corrosive formations. Just spray enough of the cleaner to ensure you are not leaving residues that can form further corrosions.
- Use pressured air or a fine-wired brush to clean the connectors or contact pins.
3. Select The Right Tow Hitch
Find the correct trailer level to prevent any drop or rise in height. This can affect the trailer electrical ground connections.
Selecting the right tow hitch is vital to the light wiring connection and safe operation of the trailer. The wrong tow hitch leads to faulty wiring and interruptible light connection and other towing hazards or accidents.
Also, you should choose a towing hitch ball mount that is easy to maintain and that allows for good wiring ground connections.
Conclusion
You have l learned “how to rewire a boat trailer” from boating experts in this unbiased review. Knowing these simple steps and useful tips leads to optimal marine trailer functions.
Use the wiring diagram, tools, quality wiring materials, and best practices to secure your boat towing. Enable a safe marine trailer that is suitable for extreme weather and restricted visibility.
Ensure every rewiring investment is worth spending to provide an effective marine trailer lighting system for your boat. The boat trailer grants you convenient and safe boat towing year-round with effective lighting.

“My intention from the first day establishing Boating Basics Online is to provide as much help as possible for boaters who want to experience a first safe and convenient trip. So feel free to join us and share your beautiful journeys to the sea!”