
Buying a wooden boat can be costly. That’s why some people choose to do it on their own and build one from scratch.
So, if you have time in your hands and want a DIY boat project, you are in luck! In this tutorial, we’ll discuss how to build a wooden boat step by step. Keep reading and learn how to make a boat to take your time on the water later.
Table of Contents
- What You’ll Need
- Steps to Build a Wooden Boat
- Step 1: Design and plan your boat.
- Step 2: Start building center rib and transom.
- Step 3: Make the frame.
- Step 4: Think about and include the frame’s fine details.
- Step 5: Add the other parts (keel strip, seat rails, and patch).
- Step 6: Add the planks and seats.
- Step 7: For the finishing touches, add epoxy, sand, and paint the wooden boat.
- Pro Tips
- Conclusion
What You’ll Need
Before you start, make sure to have the materials ready. You can check out the following list of materials, or ask a boat builder in your community if you want to build a customized wooden boat according to your preferences. Nevertheless, the following is a general guide on how you can create a boat like a pro.
- Planks of timber
- Urethane glue
- Screws
- Cordless power tools
- Marine ply
- Epoxy resin
- Epoxy putty
- Belt sander
- Rubber gloves
- Hardwood flooring
- Hand plane
- Rasp
- Fiberglass matte and tape
- Cardboard to use for creating the templates
- Acrylic paint
- Breathing protection
- Sandpaper
- Cork sandpaper block
Steps to Build a Wooden Boat
Step 1: Design and plan your boat.
On Amazon, online stores, and other boating stores, you can find and choose from a wide range of designs and plans for a simple wooden boat. Alternatively, you can also draw and sketch your design.
You might want to browse similar boat designs online and find one that matches your idea for inspiration. Don’t be hard on yourself in this part. Remember, you need not go into too many details at this point, but you only need to sketch a plan of how you visualize the output.
When done, get your cardboard to create the design you want, either in centimeters or millimeters. As needed, you can add details to the sketch. If you want a readymade plan, you can go ahead and buy one online.
Step 2: Start building center rib and transom.
Now, you can start by gluing the floorboards to create the transom. When done gluing it, you can begin to crew out the shape before cutting it out.
Sandwich your transom between the two pieces of metal or wood before clamping it tightly to ensure you flatten the transom perfectly.
If you have a kitchen wrap, get it to ensure that the two wood pieces won’t be glued to the transom. Once done, you can start sanding the wood that you’ll use for the center rib. After that, you can glue and clamp them before crewing together.
Cut out the inwales, chines, and keel once the glue dries.
Step 3: Make the frame.
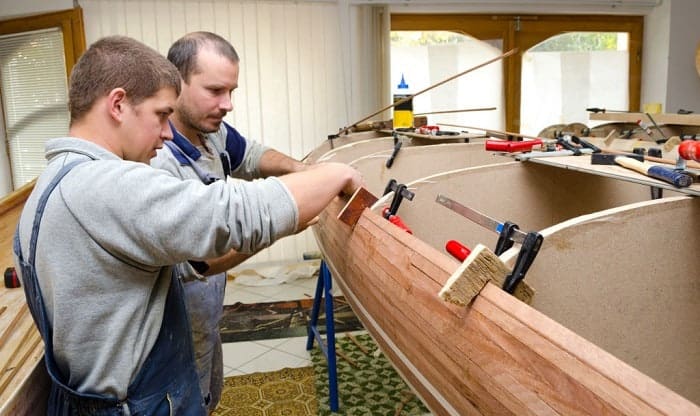
Using angle brackets and clamps, make a frame using the chines and inwales. You can then add a thwart, and make sure to keep it across the center rib temporarily. Be careful and spend more time in creating the frame because you will base your boat on it.
Once done with the desired shape, you can start screwing and gluing the chines and inwales into the stem, transom, and center rib.
Step 4: Think about and include the frame’s fine details.
When done with the shape, you can include the finer details of your frame. You can start measuring where you will add the other side ribs. Next, you can design and shape each of them.
Next, you can fit each of them to the marked positions. Check that the boat still has the symmetry.
Find the ribs across the boat’s bottom, and then use your cardboard to create a mock-up that you’ll use in cutting out the wooden ribs. When done with the ribs, you can start adding the keel.
Step 5: Add the other parts (keel strip, seat rails, and patch).
Put the keel strip, and then start positioning the rails in the place where to attach the seats. You must go every inch of your frame very carefully. Be sure to fill every space using the putty and screw rebate. It’s the final stage in the frame design.
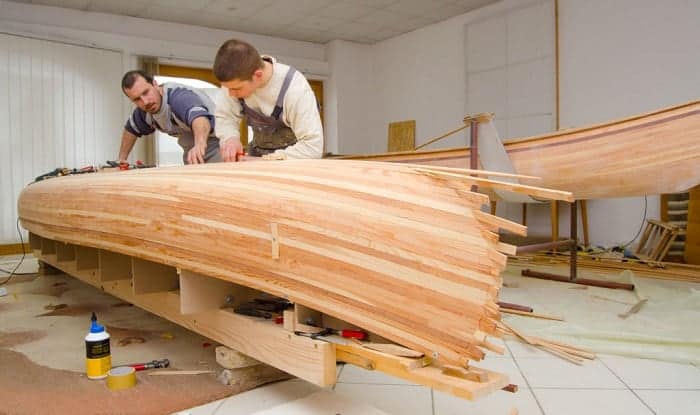
Step 6: Add the planks and seats.
You now have come to one of the thrilling aspects of building a boat. Get the cardboard, and then attach it to the sides before cutting it based on your frame’s design. Take the cardboard cutouts to use in cutting the plywood.
Get the frame. Add glue outside of it. Get the planks, add them to the boat’s sides, and then clasp the plywood every 20 to 30 cm. While still clamped, measure out the place where to make the hole for the screws. Then, screw the sides of the plywood to the boat. Check that you seal all spaces.
Once you’ve added the plywood on the boat’s exterior, add the seat planks and start securing them in the center of the boat. Put a plank of wood onto it, then attach to the keel. It will stop the seats from bending and flexing.
Step 7: For the finishing touches, add epoxy, sand, and paint the wooden boat.
Check for any space or gaps in the boat. Add epoxy putty to each of them before sanding flat. Start adding patches before sanding them flat. Turn your boat upside down. Add fiberglass, and then trim to blend with the boat’s sides.
To the boat’s exterior, add epoxy resin using brushes or rollers.
Cure the epoxy fully for two days. Once done, flip the boat over, and then add epoxy resin without the fiberglass.
Use sanding equipment and then start sanding some more. Before painting it, make sure it has a smooth surface.
Proceed with the painting of the boat if you’re satisfied with the sanding. Give your boat a name!
Pro Tips
- Be patient. According to an estimation for a simple boat, it might take six months to one year to build a wooden boat. A complicated boat design may take more than a year to complete. What takes the most time is assembling the materials and waiting for the shape and epoxy to set in.
- You can also use this tutorial to build your wooden boat.
We also have a list of the most favourite boat flags for your reference. Furthermore, check our reviews about top-rated boat flag pole if you need.
Conclusion
Learning how to build a wooden boat step by step can be a time-consuming and tedious process, but its results will be rewarding. It takes some patience to build your boat, but the relaxation and fulfillment it gives can make you feel happy.
Did you like this article? Don’t keep the information to yourself. Please share it with your social media friends today!

“My intention from the first day establishing Boating Basics Online is to provide as much help as possible for boaters who want to experience a first safe and convenient trip. So feel free to join us and share your beautiful journeys to the sea!”