
Boat upholstery can be easy to mess up, especially if you don’t have the necessary skills and knowledge to do the task properly. This guide on how to upholster curves with vinyl was written with that in mind, providing you with only the most important tips.
Since every boat’s upholstery is different, this guide is going to focus on guidelines and steps on how to upholster around curves. You’ll learn how to upholster an inside curve as well as an outside curve.
Table of Contents
- 6 Steps to Upholster Curves With Vinyl
- Step 1: Gather These Materials
- Step 2: Trace the Shape of the Curved Object You Need to Upholster With a Pen on the Vinyl
- Step 3: Cut the Outer Line Out Then Apply the All-purpose Adhesive on the Edge of the Object and the Vinyl
- Step 4: Cut Out Slits for 90-degree Turns and Inside Curves
- Step 5: Slowly Stretch and Pull the Vinyl Over the Object Then Cut Out Excess Fabric Where Needed
- Step 6: Check for Wrinkles
- Some Nifty Tips to Remember
- Conclusion
6 Steps to Upholster Curves With Vinyl
Before we upholster a curved seat or any fixture with curves, we must prepare to best avoid wrinkles or other signs of damage.
To achieve this, here are the best ways to go about it:
- Use 4-way stretch vinyl
- Apply adhesive strategically to prevent wrinkles
Most of these techniques overlap, so don’t limit yourself to just one when doing any upholstery job.
Step 1: Gather These Materials
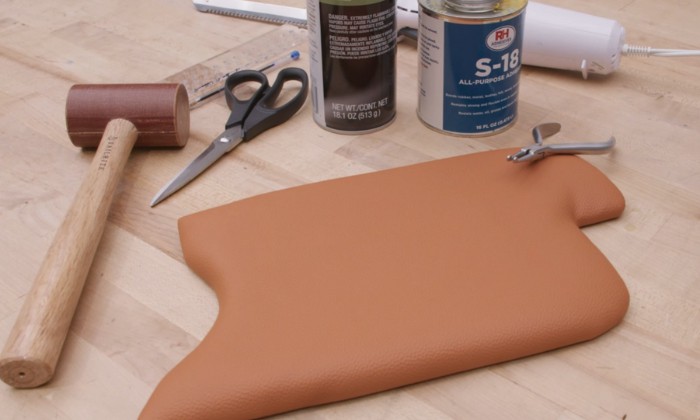
- All-purpose adhesive (contact cement)
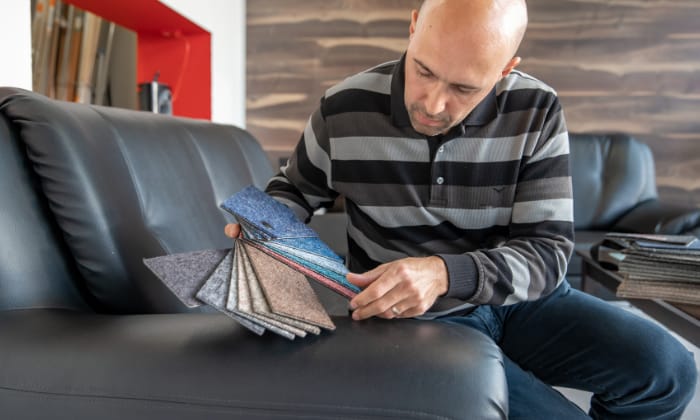
- Vinyl upholstery fabric (4-way stretch)
- Scissors
- Fabric edge match pliers
- Mallet
- Brush for applying adhesive
- Patterning ruler
- Heat gun (optional)
This list assumes that you already have the foam in place. Your only concern from this point on is getting the vinyl in place, particularly around rounded corners.
Step 2: Trace the Shape of the Curved Object You Need to Upholster With a Pen on the Vinyl
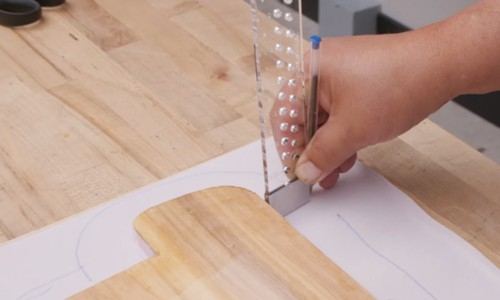
You need to do this for both the exact perimeter of the object you need to upholster, ensuring you include about an inch and a half of the former traced line to get just enough vinyl to work with. When tracing that outer line, you can use the patterning ruler along with the pen.
Step 3: Cut the Outer Line Out Then Apply the All-purpose Adhesive on the Edge of the Object and the Vinyl
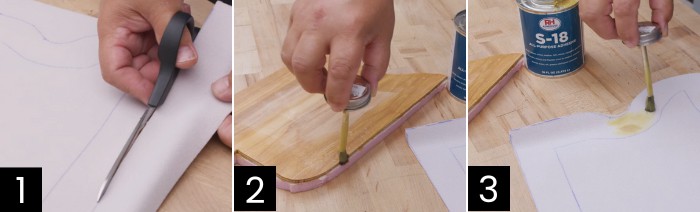
Use scissors to do all the cutting you need. Afterward, apply the all-purpose adhesive on the perimeter of the object. Obviously, you’ll be applying on the side that’s opposite of the foam (i.e. the back of the object).
It will be the adhesive that will be used to stick the vinyl onto the object so feel free to decide how much you want to apply.
Allow the adhesive to become tacky, which means it’s ready for adhesion. You’ll need to do the same for the cut vinyl. Apply it all around the perimeter starting from the outer line to the inner line.
Take Note: Based on my experience when wrapping awkward shapes, it’s always better to use adhesive than staples when ensuring optimal adhesion of the vinyl.
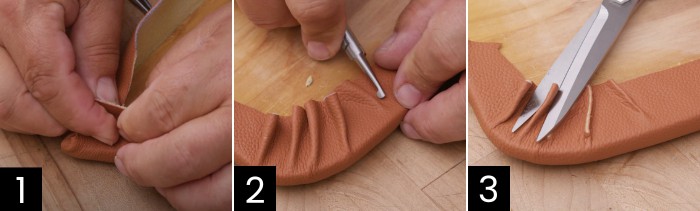
Step 4: Cut Out Slits for 90-degree Turns and Inside Curves

These are, of course, assuming the object you’re trying to upholster has these corners. This is where you’ll need to make adjustments based on your specific case.
Out of the different types of upholstery corners, an inside curve is one of the most challenging. I also understand that when you’re trying to upholster odd shapes, it can be hard to cover certain corners and curves. This is why we’re using a 4-way stretch.
Here are some upholstery corners techniques worth knowing when dealing with them:
- The key mainly lies in using good fabric edge match pliers. They work well when pulling vinyl over the adhesive-side edges of the object. Use them to detach any fabric that happens to stick to the object as you work.
- You can also go the heat gun route. Heat the fabric a little so you can stretch it into place. This should effectively remove the wrinkles the moment it starts to cool.
- Or you can cut the vinyl into strips and then staple down tabs (but the adhesive will do fine as well). You can cut right up to the point where you will not see the strips when installed but as close to the curve as you can.
- You can mark the distance with the pen, about ⅜ from the edge, then cut the strips from there.
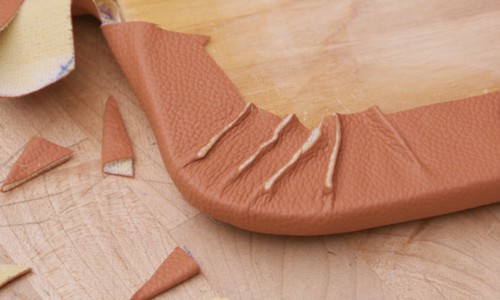
Step 5: Slowly Stretch and Pull the Vinyl Over the Object Then Cut Out Excess Fabric Where Needed
From here on, all you have to do is wrap vinyl fabric over the object to complete the job. Make good use of the pliers and mallet to stretch the vinyl and make sure it stays in place. Outside curves are far easier than their inside counterparts.
Trim off the excess fabric once you see them. Distribute the wrinkles along the edges to create a cleaner look. Use a heat gun to help stretch the vinyl upholstery when necessary.
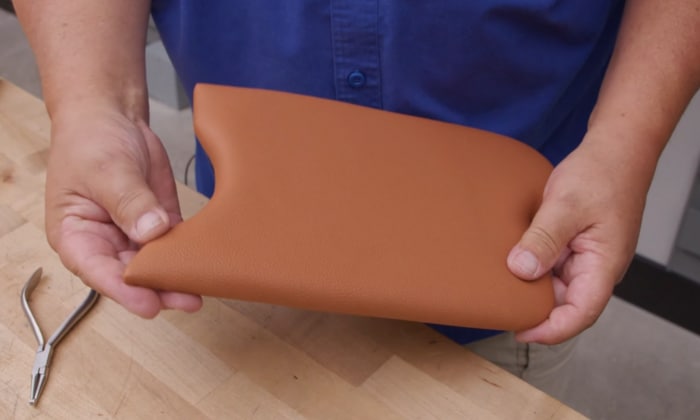
Step 6: Check for Wrinkles
Last but not least, don’t forget to check for any visible wrinkles or uneven areas. You’ll likely still be able to take off a part of the vinyl and adjust when needed.
Some Nifty Tips to Remember
- For enhanced durability, upholstering with thick fabric is almost always the best route.
- You can only use heat guns up to a certain point since they may end up softening vinyl too much to the point that they’ll begin to shrink.
- Apply vinyl wrap to curves only once you’re sure that the foam foundation is firm and supportive enough for it. Otherwise, it could result in wrinkles. Make sure it’s firm enough as well.
- Don’t be a perfectionist. Accept the fact that there will always be areas that are challenging to make perfect. Keep this in mind if you’re doing upholstering as a profession or side job to manage your clients’ expectations.
Conclusion
The key takeaway from this guide on how to upholster curves with vinyl is you simply have to know what tools you need to use. Upholstering curves with vinyl requires the right tools and techniques. Pliers and four-way stretch vinyl are your primary allies, while heat guns should be used judiciously.
Heat guns can also be used but be mindful of their downsides. Ultimately, this is a job that requires some experience to master, so don’t hesitate to grab any opportunity you get to keep on learning and practicing.

“My intention from the first day establishing Boating Basics Online is to provide as much help as possible for boaters who want to experience a first safe and convenient trip. So feel free to join us and share your beautiful journeys to the sea!”