
Kill switches from various companies may look the same to you. However, the two kinds of kill switches don’t work the same way in terms of electrical function. Thus, it’s no wonder that you have to install them in a different method.
This article is a step-by-step guide in the installation of open circuits and wireless types. You have to ensure that the wires are connected with the right parts as kill switches have a significant role in everyone’s safety in a vessel.
Therefore, it’s worthwhile to go over every step on how to install a killswitch on a boat. So, read on!
Table of Contents
Open Circuit Kill Switch
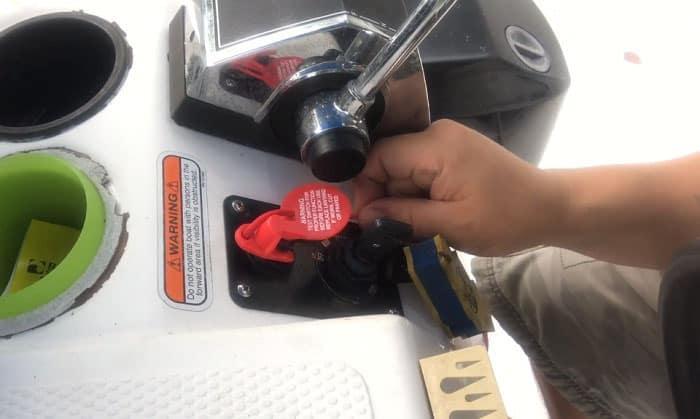
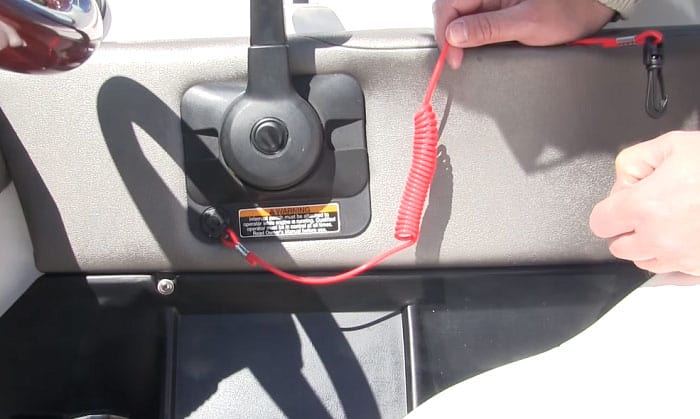
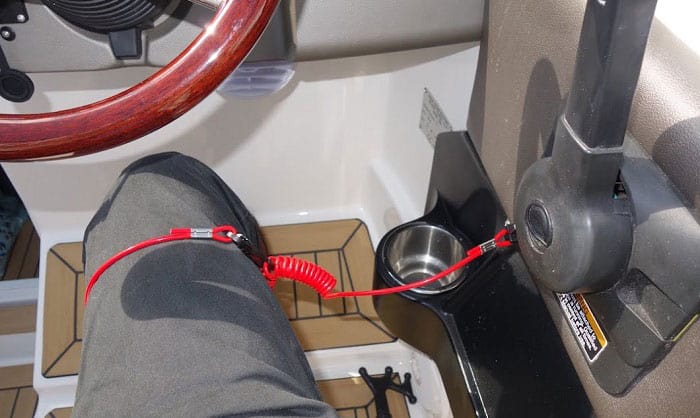
What is featured in this part is the boat kill switch with a lanyard or kill cord. One end of this lanyard is affixed to the kill switch and the other is on the driver’s leg or arm. When the helmsman is ejected from the steering area, this cord needs to be removed to give way for the sprung switch to operate.
The core of the installation of this type of kill switch is the spark plug. Wiring it to the engine’s electrical system is also essential. Some boat owners may find it challenging on how to wire a killswitch on a boat as outboard motors have different wiring.
Things will be easier for you once you understand the principles of operation. So, how does a kill switch work? It’s considered a simple device that is dependent on a spring-loaded button that keeps the switch on when the engine is active.
A clip is found below the button and it’s connected to a tether that has the other end attached to the person who controls the boat. In instances where the driver falls overboard, the tether withdraws the clip.
What happens next is shutting down the kill switch to be in its closed-circuit state. There’s a shorting out of the spark plugs, and the engine stops quickly. Some older models of outboard motors contain points and condenser systems.
This system triggers an electrical spark for this type of kill switch. Furthermore, it’s considered a magneto ignition system. On the other hand, the modern kill switch has a different way of creating the spark as it’s done through the CDI unit.
CDI is equivalent to Capacitor Discharge Ignition and it provides a high level of voltage to sustain the spark plug. It can happen at the exact time when igniting the air and fuel mixture as well as powering the boat’s engine.
When this kill switch stops the engine, it diverts the charge that sets off the spark. On smaller boats, it’s connected directly to the outboard motor. In larger boats, the wiring needs to be routed starting with the outboard until the suitable area on the console.
The possibility of mounting this switch to the boat implies that you can attach it to any type of engine. If you have an engine that has an existing push-button stop switch, you’ll only have to disconnect the wires from the button and attach it with the kill switch.
It’s common to see a kill switch mounted on the front side of the motor casing. One wire is from the ignition points, and it goes through the kill switch terminal. Then, the other wire is from the terminal, and it wraps around the metal casing of the motor.
During the installation of this outboard kill switch, you have to put these wires in a way that they won’t be stuck on the flywheel.
Some Tips
It’s recommended to have an extra lanyard placed in an accessible area in your boat. You can pick good ones from Attwood, DTLgear, Shappy, and SouthMarine.
In case the driver falls overboard, someone who’s left on board can still turn on the vessel. By turning on the boat’s engine, it will be convenient to save the person who fell off from the boat. You may also apply silicone sealant to the wire ends to keep away moisture.
Installation of Remote Engine Kill Switch
With the marine power system of the marine kill switch with a safety-stop lanyard, instant shutdown happens when the helmsman is thrown out of the boat. Also, drivers sometimes forget that they are tethered.
They unconsciously leave the driving platform and are surprised that the engine dies. It can be inconvenient during inopportune moments like when docking. Thus, a wireless kill switch for boats was invented to prevent these things from happening frequently.
The wireless type has a remote control. Although the engine shuts off when the control carrier falls overboard and away from the boat for 50 feet or less, it’s still manageable as there’s an automatic override function.
This function allows those who are left onboard to restart the engine and help the one that falls out of the vessel. Installation of this wireless outboard motor kill switch can take an hour or two.
I installed Fell Marine Mob+ Wireless Cut-off Switch in my boat. So, this guide is based on this item. Before you start, you have to ensure everything you need is on hand.
Tools that you need:
- (1 – 3 amp fuse) inline marine fuse holder
- Power drill
- 2 1/8-inch hole saw
- Strippers or wire cutters
- Crimping tool
Steps to Follow
Step 1: Installation of xHub
Select the right spot on the wheel and create a hole with a 21/16-inch diameter. You have to ensure that you have clearance for the xHub antenna that is 61/2-inch long. Before putting the antenna on the unit’s back, remove the nut.
Insert the antenna and the xHub into the hole that you made. When doing so, you have to let the gasket rest in the middle of the dash panel and xHub. In this arrangement, the battery indicator is at the top.
You can tighten the xHub nut with your bare hands as you connect the five-pin connector cable at the unit’s back.
Step 2: Working on the Power
Due to safety matters, you have to turn off the onboard battery power before connecting the cable to the power source. You’ll find a color-coded, five-wire pigtail on the connector cable.
The red, positive wires should be matched with a stable 12V DC source. You need a 1 to 3 amp fuse and a fuse block or marine in-line fuse holder for this. Then, the black wire should be added to the onboard ground terminal.
Extension of these wires might be necessary. When you need to do it, you have to utilize 16/20 AWG wire.
Step 3: Attachment of Signal Wires
The two remaining wires are expected to be attached to the present kill switch in a vessel. You can check the manufacturer’s website for a wiring schematic that fits your motor brand.
If you have the Mercury kill switch, you have to attach the xHub gray wire to the black or yellow wire that leads to the switch. The orange wire should also be linked to the black wire that is routed to the switch.
You may keep the functionality of the kill switch with a lanyard. Don’t remove the wires that are connected to the engine—just ‘T’ them with the xHub wires from the wireless type.
Step 4: Testing the Installed System
You can test the system while your boat is docked. Turn on the engine if the wires are attached to the existing kill switch. To make sure that it still functions, you have to put the lanyard to restart the motor.
You walk away from your boat or swim in the water to see if the engine stops. There will be a red light and a sound signal. In real situations, they will be an indication that a person fell overboard.
The automatic function of the wireless kill switch can reconnect in a matter of six seconds. Of course, you’ll be able to stop the engine by clicking the remote.
Final Words
There are two ways on how to install a killswitch on a boat in this article based on the styles. You can stick with the lanyard type or you can upgrade to the wireless kill switch. To minimize the disadvantage of using the former one, you can have an extra lanyard.
Be attentive to the proper installation as safety is associated with this item. It’s your responsibility as a boater to add it to your boat as it’s required by the law. So that is the end of this article. What do you think? Please like and share this article if you find it helpful.

“I am James Harvey – founder of Boating Basics Online. It is established with the drive to help out first-time boaters, which are those desiring to explore their way through the water. So if you are new to boating, start from here with me. “