
“Winter is coming,” is a common remark among boaters, marking the start of busy preparations for the changing of seasons. Surely everyone wants to winterize an outboard motor before the cold weather arrives. Especially when there is a high chance of snowflakes, you’ll be happy to winterize an outboard motor 2 stroke. The sooner you winterize boat motors, the less likely corrosions can harm them.
These are the answers you can find in this article about how to winterize an outboard boat motor:
- The tools and materials you’ll need in winterizing boat motors
- The step-by-step process of winterizing outboard boat motor
Let’s get on to it!
Table of Contents
- Here’s What You’ll Need To Prepare First
- The 8 Easy Step-By-Step Process That You Should Follow
- Step 1: Treatment of the fuel mixture
- Step 2: Plug in the earmuffs and start the engine
- Step 3: Use a fogging agent to suffocate the engine
- Step 4: Fill the combustion chamber with fog
- Step 5: Drain all the oil and replace the O-Rings on the drain screw
- Step 6: Fill the gearbox with new oil
- Step 7: Quickly reattach the drain screws
- Step 8: Tuck it away and grease the fittings
- Last Thoughts
Here’s What You’ll Need To Prepare First
1. Tools
- Gear oil pump
This transfers oil by displacement in gear-like fogging fluids or gear oil, creating a void to aid in the removal of excess liquids and preventing
- Screwdrivers
One of the basic tools in removing the motor’s drain and washer screws and reinstalling them back.
- Socket set
This is a flexible and handy collection of tool kit items for a variety of sizes and kinds of fasteners. It is mainly useful for fitting nuts and bolts.
- Ratchet wrench and extensions
Providing options other than removing your boat’s outboard, the ratchet wrench and its extensions increase the reach of a socket.
2. Materials
- Corrosion guard
This creates a water-resistant coating on either non-painted or painted surfaces.
- Fogging oil
This is an anti-corrosive material that preserves carburetors and cylinders’ interiors, especially because before the engine runs out of gasoline, it runs rough.
This keeps normal and ethanol-blended gasoline from oxidizing, as well as avoiding fuel system corrosion, gum, and varnish forms. It can lubricate gasoline injectors and carburetors effectively.
- Gear oil
Unlike any automobile gear lubricant, marine gear oil is designed to emulsify water. It keeps water from damaging the working components of a boat motor, providing lubrication and preventing the motor’s lower unit from freezing.
- O-Rings
The O-Rings restrict liquid or gas from escaping. It will be inserted into a groove and squeezed between two surfaces in an outboard motor.
- Spark plugs
Marine spark plugs take in electricity on one end and create a spark on the other. When a spark becomes “cold”, it has lower insulation and retains less heat. Deposits form when the plug becomes too cold and ultimately shorts out.
The 8 Easy Step-By-Step Process That You Should Follow
Step 1: Treatment of the fuel mixture
To prevent the mix from turning bad during the winter, use a marine-grade gas stabilizer. One ounce of stabilizer will treat ten gallons.
If your motor has a 3-gallon tank, pour in about half an ounce and slosh it a little to mix it up.
Adding a bit of extra stabilizer than the usual instruction says won’t cause any
Step 2: Plug in the earmuffs and start the engine
Attach a hose to the fluid intake ports on the unit’s bottom and attach a set of flush or earmuffs to them.
Start the engine and turn on the water.
Allow the engine to warm up for approximately 5 minutes before applying the stabilized gas mix to the whole engine.
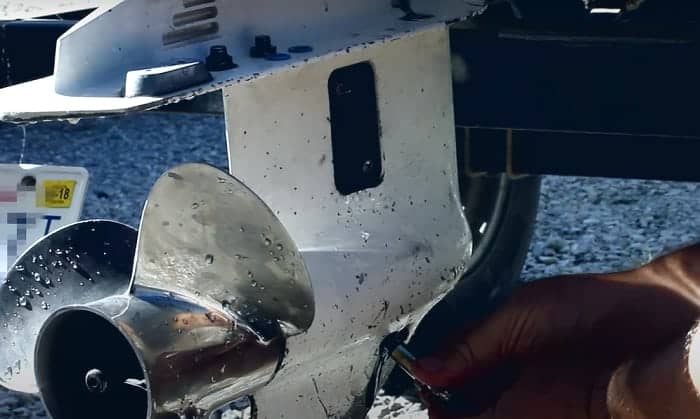
Note: This is also an excellent opportunity to inspect the impeller’s operation. If the impeller is spewing out water, it is performing its job; otherwise, it has to be replaced.
Step 3: Use a fogging agent to suffocate the engine
Take out the engine cover then look for the air intake hole on the carburetor.
Spray the intake with a tiny quantity of fogging oil while the engine is running.
The engine will try to die, but by increasing the throttle, you can keep it going.
Fog the engine until it shuts down.
Note: You’re doing it correctly if white smoke flows out of the exhaust.
Step 4: Fill the combustion chamber with fog
Remove the spark plug boots and unscrew them.
Change the spark plugs if their connections seem rusted and spray some fogging oil on the inside of the chamber; otherwise, use the old ones.
Pull the starting string a few times to coat the piston and cylinder with the fogging oil while keeping the spark plugs in position and their boots off.
Step 5: Drain all the oil and replace the O-Rings on the drain screw
First, remove the bottom drain cap screw, then the top drain cap screw.
Allow the engine oil to drain freely.
Double check to ensure that you are also draining engine oil from your lower end gears.
Remove the old O-rings out from drain screws.
Replace them with new ones, as this will guarantee that the seal is strong.
All O-rings come in a common flexible range of kits. Ensure they have the basic form or shape you need across your boat motor drain screw and other fittings.
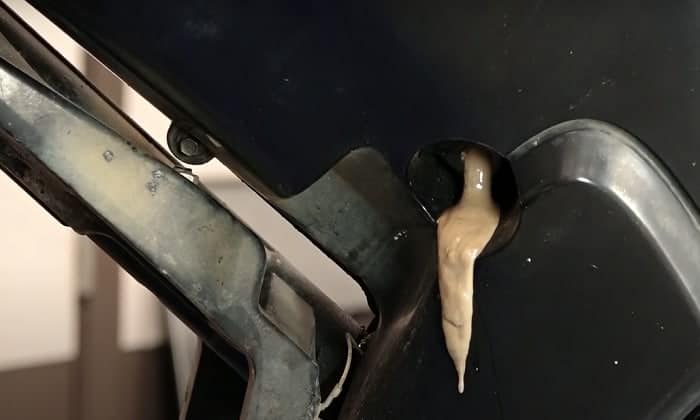
Step 6: Fill the gearbox with new oil
To a quart of marine grade gear oil, attach a pump handle.
The pump’s other end will be threaded into the bottom drain port.
Fill the bottom end with fresh oil until the oil reaches the oil filler level. You can notice that it will be coming back out when it does. Observe the oil draining from the top drain hole when you do the filling correctly.
Step 7: Quickly reattach the drain screws
To begin, tighten the top drain screw. This will keep the fresh oil from leaking out too fast.
Then, hastily screw in the lower drain screw after removing the pump from the lower drain port. Ensure this common source of incorrect maintenance tasks that lead to electric motor risks and failures. Making sure you attach the motor boat drain screw can save more boating memories and secure the safety of your family.
Step 8: Tuck it away and grease the fittings
Grease all of the motor’s fittings to prevent it from various risks and failures of malfunctioning. It’s better to use a grease gun to do it with precision, ensuring the flow and pressure of lubricating your boat motor, Especially if your unit has a grease nipple near the steering component from the mounting bracket and a grease nipple within the engine cover for cover latching.
So it doesn’t fail when running in the water, use marine-grade grease.
After it has been oiled, store it in a secure place until next season.
You can appreciate more details on this YouTube video from Boat Parts.
Last Thoughts
During the process on how to winterize an outboard boat motor, get the focus you need. Double check the engine, fuel systems, plumbing, and any other systems that may retain water.
Include the suggestions from the websites supplied and consider the manufacturer’s instructions for winterizing your boat motor via the owner’s handbook as well. Now, you are in excellent condition for the winter.
There may be cases you encounter unexpected situations in the winterizing process. Feel free to call your experienced buddy to help, or get an expert to do it for you.

“I am James Harvey – founder of Boating Basics Online. It is established with the drive to help out first-time boaters, which are those desiring to explore their way through the water. So if you are new to boating, start from here with me. “