
Got a plywood boat that you’re just finishing up? Perhaps, you’re just doing a reseal of a used wooden boat? If you find yourself in the dark with regards to how to waterproof plywood for a boat, no worries, this guide has got your back.
Whether you’re looking for the cheapest way to waterproof plywood or are aiming for a higher-quality and more long-lasting solution, you can learn every viable method and the steps for each one.
Table of Contents
Ways to Waterproof Plywood for a Boat
For everyone’s benefit, I’ve chosen to outline two methods that suit the usual needs and requirements when it comes to most marine plywood waterproof projects. By reading this guide, you’ll learn about:
- The Cheap sealant + Latex paint method for people who want an economical but still reliable way to keep the plywood from rotting and splitting apart.
- The Fiberglass Cloth + Epoxy Strategy for guys and gals who prefer the best way to tackle marine plywood treatment (aka the one that will make sure your boat will last for years).
You’ll Need a Few Tools
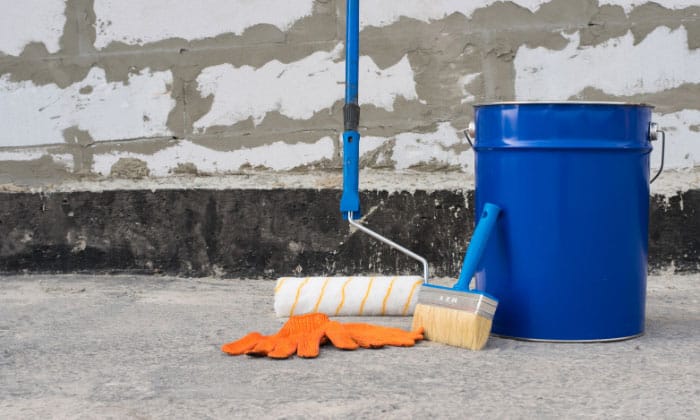
Cheap Sealant + Latex Paint Method
- Marine plywood sealer (e.g. Loctite PL marine sealant)
- Latex paint
- 80-grit sandpaper or any you find great for finishing
- Primer
- Cleaning cloth
- Roller and brush
- Acetone
- Paint sticks and towels
- Mask
- Tack cloth
Fiberglass Cloth + Epoxy Method
- Epoxy resin with hardener
- Fiberglass cloth (high-quality preferably)
- Sandpaper (60-grit,120-grit, and 180-grit)
- Mixing cups
- Paintbrush
- Squeegee
- Stirring stick
- Foam roller
- Mask
- Cleaning cloth
Step-by-step Guides on How to Waterproof Plywood for Boats
This is recommended for sealing plywood boat floor, but not if you leave your vessel in the water often.
If you’re alright with that, then go ahead and follow these steps.
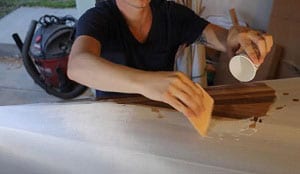
1. Clean and sand the wood.
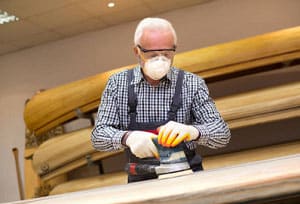
Use any cleaning cloth you have on hand that’s suitable for wood to prepare the hull. Dab it in acetone to get it dry and get rid of any dirt and other unwanted specks the boat may have.
Follow the instructions given by the acetone manufacturer on how long you’re supposed to wait for it to dry. Once it’s nice and dry, you can begin sanding.
Use sandpaper that’s at least 80-grit, since it’s what’s ideal for most finishing endeavors. Shoot for as smooth a surface as possible. And don’t forget to wear your mask!
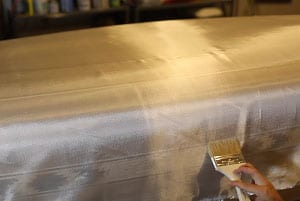
2. Apply the sealant on the seams then sand it again.
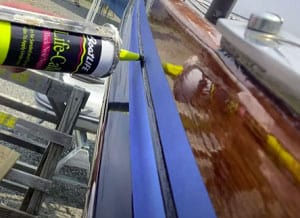
When it comes to sealing plywood for marine use on the cheap, I always use a marine sealant like the ones offered by Loctite or other relevant brands. This prevents the common issue of the plywood’s edges soaking up water.
Once that’s done, you can now start applying the sealant. Follow brand instructions on how to use the caulking gun, but it should be pretty easy to aim toward the wood.
All locked in? Now, the waiting game starts. Most sealants take a whole day or two to completely cure.
After the sealant has cured, you need to sand its surface to make sure that the paint will stick. Don’t forget to do that before applying the paint’s primer!
3. Do the first coat of primer then sand.
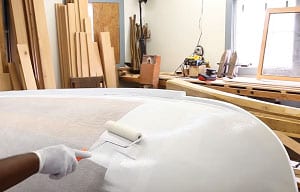
Check the bottle on how best to apply the primer. You can probably use either a brush or roller, whichever you’re comfortable with. I suggest you stick to the recommendations as to how thin or thick you need to apply it.
Wait for it to dry. It shouldn’t take more than an hour if the temperature and humidity in your work area are cooperating.
All dried up? Time for another round of sanding and cleaning with the tack cloth.
4. Apply a second primer coat before brushing or rolling the latex paint.

You basically repeat the steps for applying the primer once you’re done prepping the wood for painting. Again, wait for it to dry.
From here on, you have free rein on how you want to paint the plywood. Just be sure to read the label! The primer should help in getting a smooth finish, but be sure to take care of imperfections.
At best, latex is the only waterproofing paint for plywood that does a decent job if epoxy is out of the equation. It may have a few major downsides, but I can’t name a better option when painting marine plywood.
This method is relatively harder, as a single mistake can cause you to start over. A helping hand or two would be most welcome, too.
1. Sand and clean the boat then lay the fiberglass cloth.
Put on the mask, then sand the hull’s exterior with 60-grit paper first. Swap to the 120-grit and 180-grit as you continue to do so for a smoother result.
Wipe the surface down with a cloth, and dab it with acetone if needed. Just make sure that it’s dust- and debris-free before laying down the cloth.
Afterward, roll the fiberglass cloth carefully to cover the entire surface. Naturally, it will be curved, so you can expect some wrinkling. Use the brush to push down and smoothen the cloth.
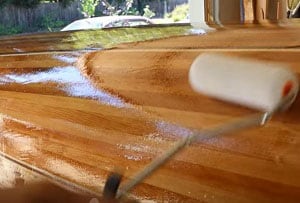
2. Mix the epoxy then apply the first coat.
It’s time to waterproof plywood subfloor. With epoxy resin, you always need to stick to the manufacturer’s recommendation for the ratio.
Stir both the inside and outside of the mix. Moreover, refrain from making one large mixture, as you may not follow the correct ratio!
Done with the mix? Start applying it by pouring small amounts on the fiberglass and using the squeegee to help spread it around for the mat to soak evenly. Flatten any excess epoxy you see.
You’ll need to cover the entire span of the hull. Once you reach the edges, feel free to cut off the excess cloth.
3. Wait for the coat to settle then apply the next one.
This will take just a few hours of waiting, more or less depending on the epoxy you used. You can apply the second coat even if the first one’s still a bit tacky.
This time, use the roller. Again, pour some epoxy over the surface then roll it on for good coverage while making sure there are no bumps.
Wait for this coat to dry then apply the third one and any subsequent coats you decide to apply, then wait for them to fully cure. Four coats normally get the job done for me.
The steps are essentially the same for the inside of the hull and when waterproofing plywood boat deck. So just repeat them once you’ve flipped your boat.
Pros and Cons of Each Method
Sealant + Latex
Pros
- Relatively easier to do
- More budget-friendly
- More manageable overall
Cons
- While latex can make plywood water resistant to a degree, it will inevitably wash out quickly if exposed to moisture consistently.
- Only a short-term solution
Fiberglass + Epoxy
Pros
- For its ability to guarantee long-term durability and usage of the boat you built, many consider this the best DIY technique to waterproof and weatherproof plywood.
- Highly resistant to physical damage and the elements
- Works well with any kind of plywood
Cons
- Improperly mixed epoxy can result in soft spots.
- Chopped strand mat, which is the cheaper fiberglass type, does not work with epoxy resin.
Other Ways You Can Consider
- If you find fiberglass to be a bit overpriced in your area, you can try the popular poor man’s fiberglass method laid out here.
- You can also look into marine sealing tapes, although I admit that I haven’t tried them yet.
Features and Durability of Plywood for a Boat
- It may not be as water-resistant as cedar, but it can take a lot of punches, figurative or otherwise, and is highly shock absorbent. Any hardwood plywood balances strength and durability almost perfectly, with those made of Baltic birch being excellent example
- Amenable to being waterproofed and resistant to fire.
- Out of all the wood choices out there, plywood wins in keeping weight down.
- Highly pliant, which makes it a great material for hulls.
- Cost-effective, since plywood’s available in various sizes and have wide coverage.
- A breeze to handle (and sand), which is why it’s a favorite among boatbuilders.
The Importance of Sealing Plywood
Boat builders use epoxy sealer for marine plywood because they don’t want to have all their efforts of making their babies go to waste.
If you don’t regard what you created as just some “prototype”, but rather similar to a child that you birthed with your own hands, then I assume you’ll be more likely to want to ensure it will last for decades, right?
Can you endure the thought of the sun’s harsh UV rays beating down on it? Or high humidity and not hauling the boat out of water, which will almost always result in rot?
That’s why, to me, anything you own that’s made of plywood and meant for outdoor use should be sealed, especially the boats you made from scratch.
Conclusion
As far as how to waterproof plywood for a boat goes, you can choose between two routes.
One will be easier on your wallet but tends to only be a temporary solution. The other, while costing more, will give you better peace of mind with regard to your creation’s expected mileage.
Weigh your options based on your needs and remember all the pointers I’ve given here to avoid potential mistakes.

“My intention from the first day establishing Boating Basics Online is to provide as much help as possible for boaters who want to experience a first safe and convenient trip. So feel free to join us and share your beautiful journeys to the sea!”