Did your ride recently take a hit? I know the feeling.
Whether it’s just a teeny tiny scratch or a crummy crack, we want to fix our babies asap. I mean, who can endure those unsightly blemishes on them anyway?
However, DIY fiberglass boat repair can be challenging because extensive damage sometimes requires access to both sides of the hull.
I’ll teach you how to repair a fiberglass boat hull from the outside with this post, meaning it’s best applied to minor damage to the hull only. I’ve revealed some strategies to achieve stellar results every time.
Table of Contents
- Step-by-step Guide on How to Repair a Fiberglass Hull From the Outside
- Grab a Couple of These Tools First
- Mind and Follow These Steps
- 1. Grind back the damaged area.
- 2. Decide the number of fiberglass mat layers.
- 3, Lay the fiberglass mat on top of the hole, then trace and cut out its shape.
- 4. Wipe down the damaged area with solvent wash and the resin or epoxy.
- 5. Lay the layer/layers of mat on the hole.
- 6. Apply the topcoat and start sanding.
- 7. Wipe down the sanded surface, apply a fairing compound, then sand it again.
- Tips to Find a Leak in a Fiberglass Boat
- Conclusion
Step-by-step Guide on How to Repair a Fiberglass Hull From the Outside
Grab a Couple of These Tools First
- 1708 and chopped fiberglass mats
- Disc sander
- Medium-grit sanding disc
- Polyester resin or epoxy
- Solvent wash
- Fairing compound
- 80-grit sandpaper
- Clean rag
- Marker pen
- Mixing cup
- Paintbrush
- Gelcoat with wax
- Cutting tool for fiberglass mat
- Face mask
- Thickened polyester resin (optional)
Let me first be clear about the steps I’ve shared here. You should think twice if you’re planning to do this on a major fiberglass repair boat.
Repairing a hull solely from one side (i.e., outside) can only go so far. I usually only reserve it for instances like I need to repair fiberglass boat hull crack and small holes, as these don’t require a demolition job.
If you’re dealing with an undeniably large hole, especially if it’s below the waterline, it’s almost always better to do fiberglass hull repair from both sides. Trust me; you’ll only get a better and safer result that way.
Mind and Follow These Steps
1. Grind back the damaged area.
Obviously, every case is different. You may need to repair deep scratch in boat hull or a tiny hole.
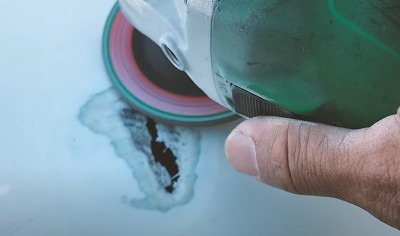
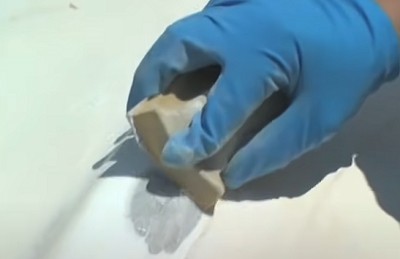
Whether I repair chips in fiberglass boat hull or minor holes, I always grind the damaged area first, gelcoat included. This allows me to check the actual extent of the damage, clean the area, and make the overall repair job more successful.
To grind back the hull, use a disc sander with a medium-grit disc and gently go around the damaged area. Don’t forget to put on your face mask before grinding.
Take note: when I’m repairing fiberglass boat hulls from the outside, I tend to taper out to a larger area, 18:1 or 24:1 ratio, instead of the typical 12:1. That means for every inch of the laminate you repair, you need to sand or taper out to 18 or 24 inches.
That former ratios, to me, are the best ways to ensure a more solid, stable result that can handle future stress better, so much so that it can rival a more thorough fiberglass boat bottom repair done from both sides.
2. Decide the number of fiberglass mat layers.
More often than not, a single layer will do, especially as I’ve already assumed that you’re only doing a minor repair.
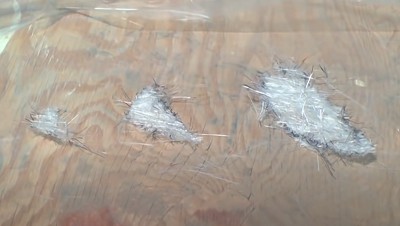
However, it doesn’t hurt to do a combination of chopped strands and 1708 fiberglass. For example, you can use one layer of 1708 fiberglass first and then lay two layers of chopped strand mat on top since that sands more smoothly.
- For me, though, as for other professional boat repairers, the chopped strand is more for cosmetics, while 1708 is better for making the actual structural repairs. In short, anytime you need strength or aesthetics, go for the latter or the former, respectively.
- The downside of 1708 is that it often leads to print-through issues, but that’s not the case for chopped strands, making it a better option for stabilizing the surface.
3, Lay the fiberglass mat on top of the hole, then trace and cut out its shape.
Once you’ve decided on a setup, lay the first layer of the mat on the hole, then trace its outline using the pen. Cut out what you’ve traced with either scissors, a utility knife, a rotary cutter, or anything you have at your disposal that can cleanly cut a fiberglass mat.
For every subsequent mat layer you cut out, make the succeeding one an inch or two larger than the one that preceded it. That is, of course, assuming you’re going for multiple layers of fiberglass.
Feel free to follow the recommendation I shared above (1 layer of 1708 below 2 layers of the chopped strand). That’s what I found to be the optimal mix for most of the structural fiberglass repair jobs I’ve done.
4. Wipe down the damaged area with solvent wash and the resin or epoxy.
Grab the rag, then dab it with a couple of drops of the solvent wash. Afterward, wipe it on the surface you’ve ground.
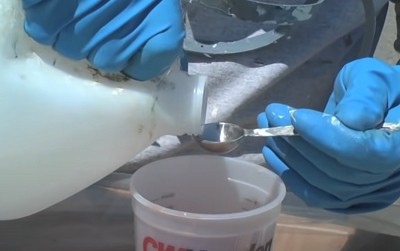
Mix and/or thicken the polyester resin or epoxy as it needs to be. If you bought a repair kit, it may have come with a mixing measuring cup and stirrer, so don’t hesitate to use those.
I won’t give any exact recommendations, as I’ve found that it’s best to stick to the manufacturer’s own instructions. As for applying:
- You can actually use both (i.e., use polyester on the first layer, then settle for repair epoxy as the undercoat for the final paint layer).
- Other old salts stick to just epoxy mixed with Visqueen, as they attest to it adhering better.
I don’t like to nitpick between the two, as I’ve found both to be reliable when patching fiberglass boat that’s only been marginally damaged. Ultimately, it’s your choice.
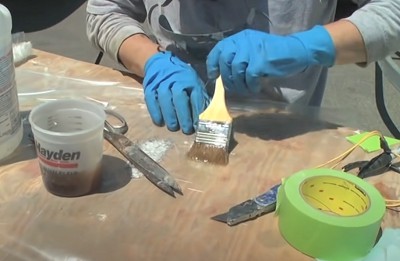
Use the paintbrush to generously slather each layer of fiberglass mat you’ve cut out with the resin and epoxy.
Read more: The most suitable paint for fiberglass boats.
5. Lay the layer/layers of mat on the hole.
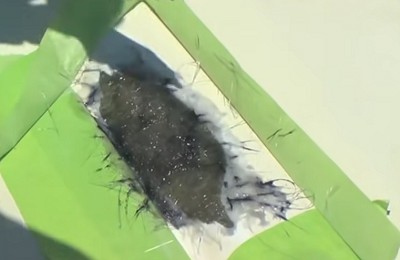
Carefully pick up the epoxy-laden mats, then lay them on top of the hole. If you’re laying down multiple mats, be sure that the intended first layer is the one to cover the hole.
Aim for good adherence on the edges of the hole.
You may see some dimpling in the middle, especially if the hole is big enough. Be sure to minimize that risk by refraining from pushing down the mat as you’re laying it down.
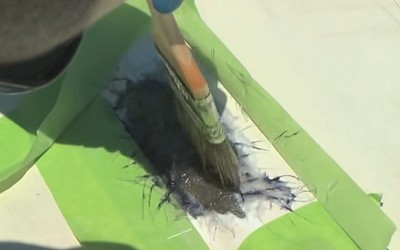
You can then use the paintbrush to straighten the mat out by tapping the areas covering the edges of the hole ever so carefully. Once that’s done, just wait for the resin to harden (around an hour).
Anyway, you still need to apply an even layer (or more) of the thickened resin before doing the topcoat. The more layers you make, the more sanding you’ll inevitably do, though.
Once you’re done with that, it’s a matter of waiting a day for it to dry.
6. Apply the topcoat and start sanding.
The topcoat can be PVA or gelcoat mixed with wax. Apply either based on the manufacturer’s recommendations.
- I find the latter to be better overall for these cases where I’m doing minor fiberglass patches for boats, and it’s also guaranteed to result in a thicker, tougher laye
- Be sure you don’t expose the wax to sunlight, though.
Then, put that mask on again.
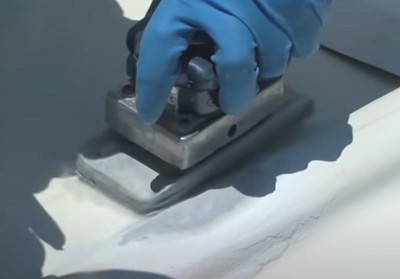
When sanding, you don’t have to beat yourself up and be a perfectionist. You just want to get the edges down and the surface to be as even as you can get it.
That being said, it certainly doesn’t hurt to exert extra effort for it to be close to perfect. I usually start on the perimeter and then work my way to the middle.
Check all the uneven protuberances of paint and epoxy that are still visible and knock them down. Be sure not to go overboard, so you won’t get a lot of low spots – if at all.
7. Wipe down the sanded surface, apply a fairing compound, then sand it again.
Wipe the damaged area to get rid of the sanding dust.
Once done, prepare the fairing compound. Use the spreader to apply an even not-too-thick layer of the compound.
Afterward, use a sander to even it out again. Wait for the fresh layer to dry. Then, sand it down with the 80-grit. If the colors of the repaired spot and the rest of the hull are mismatched, spray-paint the area.
And, you’re basically done repairing after that! Give yourself a pat on the back for a job well done and the dough you’ve saved.
Incidentally, if you’re wondering how much you’ve saved, the cost to repair fiberglass boat hull nowadays is close to $500.
Tips to Find a Leak in a Fiberglass Boat
- Double-check areas where holes often rear their ugly heads, such as any area at the bottom of the boat, above and below the waterline, areas near the thru-hulls, scupper hoses, etc.
- Seal all the holes and ports on your vessel. Then use a leaf blower to pressurize its
- Sprinkle some baby powder on areas where you suspect there are holes. The powder will often create water tracks that will reveal the hole for you.
- Give any nook and cranny a thorough scrubbing. You’ll never know when a black “patch” of dirt will actually turn out to be a gaping crack or hole.
Conclusion
How did you like my guide on how to repair a fiberglass boat hull from the outside? Think you’re up for it? Of course, you are!
These are everything you’ll need to go through:
- Grind and clean the damaged area.
- Select the number of fiberglass layers, then cut them out to fill in the hole.
- Apply the solvent wash and the epoxy on the mat.
- Lay it correctly on top of the hole.
- Brush the topcoat on, then sand as needed.
We hope this article clears things up for you. Good luck with your repair!

“My intention from the first day establishing Boating Basics Online is to provide as much help as possible for boaters who want to experience a first safe and convenient trip. So feel free to join us and share your beautiful journeys to the sea!”

