

- Prepare the boat and materials
- Remove hardware from the boat
- Perform cleaning and maintenance
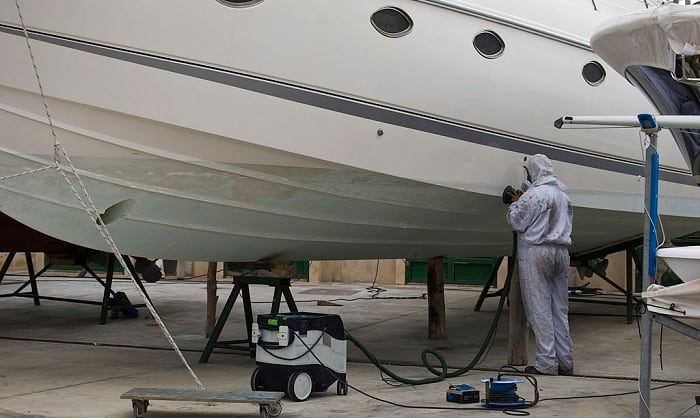
- Sand the painting surface
- Apply painter’s tape and covers
- Coat with primer
- Apply the paint and dry
Paint is always important to boats in order to protect them against damage from the elements. However, painting a fiberglass boat is a complex task, and having it done professionally can cost a fortune.
While it will always take time and effort, we can make it simple. In this guide, we will go over how to paint a fiberglass boat in a simple way that also looks great.
Sounds too good to be true? Read on and see for yourself.
What You’ll Need
1. Fiberglass Primer
- The primer should be compatible with the fiberglass boat paint
2. Fiberglass boat paint
- Epoxy – harder and more durable against impact
- Urethane – thinner and easier to work with
3. Painting tape and cover
4. Paintbrush and roller
5. Sandpaper – prepare 2 kinds
- 220 to 300 grit for all sanding
- 120 to 200 grit for sanding down oxidation
6. Orbital Sander (optional)
7. Epoxy Filling
8. Trowel
9. Cleaning Supplies
- Soap and water
- Soft-bristle cleaning brush
- Drying towels or cloth
Steps to Paint a Fiberglass
Step 1: Prepare the boat and the materials
First, pick an appropriate location. Remember that paint has strong fumes which can be dangerous to inhale. It’s important to pick a location with sufficient ventilation. Spray painting has some strict requirements, including legal ones, so make sure to meet those if you plan on using spray paint.
Next, make sure that you have everything ready before starting work on the boat. It will take a lot of time, but it’s better to be sure that all your items work well with each other. It will be harder to have to adjust in the middle of the project.
Step 2: Remove hardware
The next step is to remove all the hardware on the boat. This includes even installed hardware. Doors, windows, frames, anything that can get in the way of the paint should be removed.
Applying cover is something that many people do, as do I, but if we want to get the best result we can, removing all hardware is the best choice. Removing everything will be time-consuming but it is for the best in the long run.
It can also prevent further problems down the line, potentially saving us time from having to work them out later.
Step 3: Perform cleaning and maintenance
Cleaning has to be done, and it’s very important to remove any debris, dirt, or any other deposits on the fiberglass surface. This makes work easier and more efficient. Soap and water are effective enough, just be sure to wash the soap away entirely.
After cleaning, inspect the painting surface for any breaks as painting over these will result in an uneven surface and the paint will end up highlighting these imperfections. Use epoxy filling to even out these breaks.
Don’t be afraid to make a bump on the surface since this can be leveled later on.
Step 4: Sand the painting surface
The next step is sanding, which is extremely important to achieve a good and consistent finish. We have to sand the entire painting surface to ensure that it is even. Use 220 to 300 grit sandpaper.
While sanding the whole thing by hand works, using an orbital sander will make things much easier and allow us to work faster. However, try to keep expectations in check and expect that the work will still take a lot of time even with the use of a sander.
If you’re working on an old boat with oxidized paint, use 120 to 180 grit sandpaper.
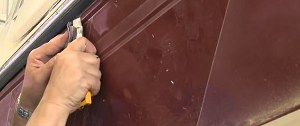
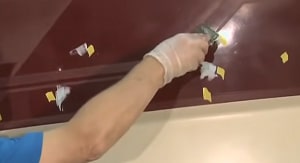
Step 5: Apply covers and tape
Split the painting surface into sections and work on them one by one. This is to ensure that you have enough time to apply the paint properly. Splitting the work into sections may sound like a hassle but it allows for more comfortable and efficient work.
Remember to cover any gaps or spaces as well. It is important to be deliberate in applying paint to avoid weaknesses in the paint surface that can start any flaking or peeling. A good paint job can last even 10 years.
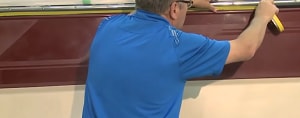
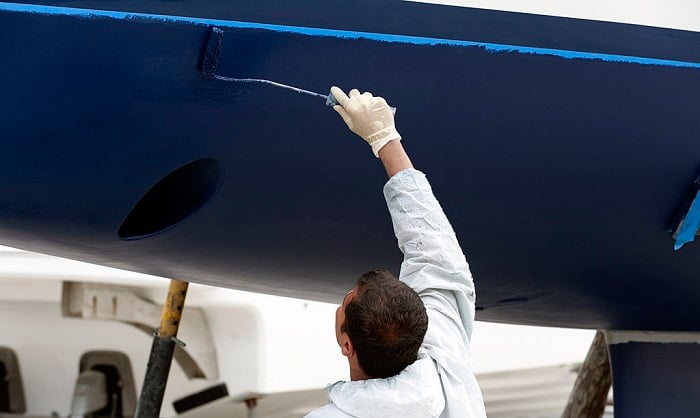
Step 6: Coat with primer
Now it’s time to start with applying the primer. While it is recommended to use 2 to 3 coats of primer, also consider the instructions that come with the primer itself.
Personally, I use two coats of primer, but the most important thing is to be even and consistent. The primer acts as a foundation to the paint, so it’s a good idea to be careful in applying the coat. Apply in smaller sections and carefully with horizontal strokes using a brush or roller.
Let the primer dry before applying the next coat or the paint.
Step 7: Paint and dry
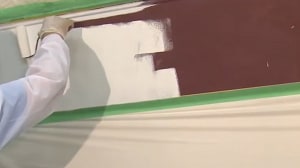
I prefer two-part urethane paint for a more consistent result. But in order to be able to use the paint properly, I prefer to work in smaller sections with a limited amount of paint.
Two-part paint will usually have a working time of around 2 hours, so take note of that. Set enough time to apply the paint horizontally then go back to tip it by brushing vertically.
One to two coats should do the trick. Make sure to allow it enough time to cure in between coats, and at least 48 hours before going in the water.
Frequently Asked Questions
How to choose what paint to use?
What paint to use on fiberglass boat usually comes down to two choices: urethane and epoxy. Epoxy is thick and heavy, and it is more durable against impact. Urethane is thinner and more durable against wear.
I prefer urethane because it is easier to work with compared to epoxy, which involves a more complicated mixing process.
What is the difference between 1-part and 2-part urethane?
Urethane paint for fiberglass boat hulls is available in 1-part and 2-part. They work in similar ways, but using them results in different finishes.
2-part urethane requires mixing two components together. After mixing, the paint will harden usually after 2 hours.
1-part paint does not require mixing. Instead, it will harden on its own after being exposed to air. Usually, it takes over 12 hours for 1-part urethane to dry.
Pro Tips:
- If repainting fiberglass boat, dewax the boat first if any wax was previously applied for easier prep.
- Sand down the primed surface after drying for better results.
- Allow the paint to dry before the next coat.
- Remove caulking before painting a fiberglass boat and reapply after the paint job is completed.
- Apply wax for a better shine and long-lasting protection.
- Apply anti-fouling paint below the waterline of your boat to protect against algae and barnacle growth.
- Paint under a shade at 70F to 80F for the best handling condition of paints.
Conclusion
This is where we end our short guide on how to paint a fiberglass boat. While it is time-consuming and a lot of work, the results are worth it. It is fine to be proud of the work you put in, and seeing your boat in good condition is the best reward.
Did you find this guide helpful? If you did, please share it with others so they can learn something as well. Also, do leave your comments below as we’d love to read them.
Remember to boat safely.

“My intention from the first day establishing Boating Basics Online is to provide as much help as possible for boaters who want to experience a first safe and convenient trip. So feel free to join us and share your beautiful journeys to the sea!”