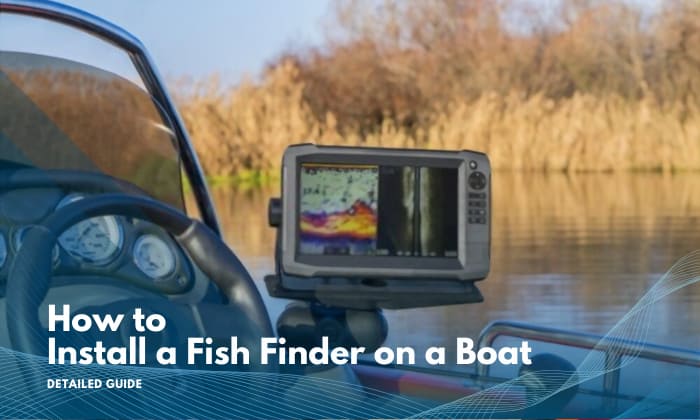
Nowadays, every fishing trip is never complete without a handy fish finder. It saves plenty of time looking and helps to catch more fish. Pretty much a win-win situation any modern angler can’t miss.
Installing this relatively expensive tool can be tricky, though. Much like any method, it requires taking the time to learn how to install a fish finder on a boat. Knowing strategies that will ensure it’s done properly and guarantee optimal results goes a long way, too.
This entire guide is concerned with all those essential aspects and applies to every fish finder model and boat type available today.
Table of Contents
Tools to Prepare
- Fish finder
- Transducer
- Battery
- Transducer mounting plate
- Drilling tool
- Screw gun
- Cable tie gun
- Silicone (marine grade preferably)
- Fish tape
- Fuse block
- Circuit breaker
- Correct gauge wire
Step-by-step Guide on How to Install a Fish Finder on Your Vessel
Step 1: Figure out where you’re going to install the fish finder and transducer on your boat
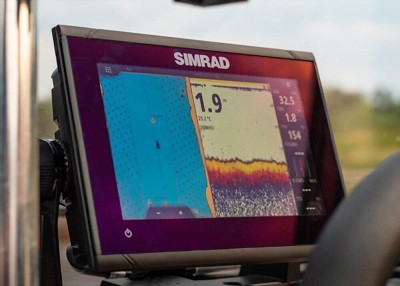
The fish finder display should be in a location that you can easily access and won’t obstruct you or other equipment, such as the dashboard. On smaller boats like a jon boat or on kayak, it can be mounted in front of you and near where you’re seated most of the time.
Note: By installing it at the front or on the bow, you spare yourself from the hassle of looking back on the unit just to check the info on the fish finder.
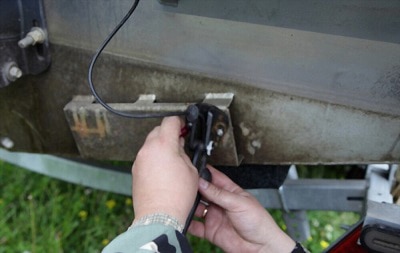
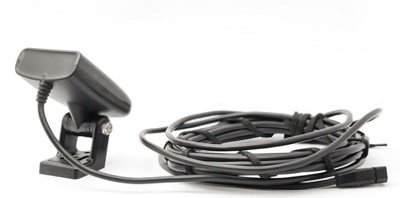
02 The transducerThe transducer is often installed on the starboard side of the transom on center console, on an inflatable, or on a bass boat – the go-to vessels for fishing.
But if you’re installing it on a kayak or a fiberglass boat, you can opt for in-hull installation.
The transducer you buy will make it clear whether it’s transom-mount or through-hull. Transom-mount transducers require you to drill holes in the transom, while through-hull units warrant cutting a hole in the hull.
Note: Some might want to use mounting pads, as we do not have to drill holes when mounting on the transom.
However, I don’t like using them on most boats because they’re flimsy and tend to get unstuck easily compared to properly installed mounting plates.
Step 2: Install the transducer mounting plate.
When you’re trying to install a fish finder transducer, be sure to remember the following points:
- Mount it ¼” or ½” up from or flush with the hull’s bottom. This way, there will be minimal drag, if there’s any.
- Make sure to position it at a safe distance away from the motor if, for instance, you’re installing it on a pontoon boat with an outboard motor. This way, the transducer won’t make contact with the motor or encounter any interference once the latter is trimmed down.
- For optimal reading at speed, pay attention to things you should avoid like metal objects, electronics, and even bubbles created by planing strakes.
Time to start mounting the plate:
- Begin by positioning the mounting plate by following the recommendations above.
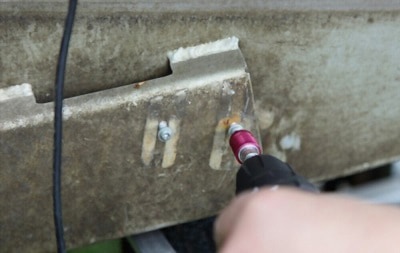
- Mark two holes on the hull using the plate’s screw holes as a reference. Remove the plate then start drilling the two holes in the hull.
- From there, you only need to screw the plate in place. Use either a screwdriver or a screw gun for ease then add a dab of silicone to them for added security.
If you’re installing the transducer on a kayak, I suggest you watch this dedicated video instead as it has one of the best explanations I’ve seen for that specific topic:
You might get a couple of mounting ideas, too!
Step 3: Mount the transducer
When it comes to this step, I recommend following any specific instructions or tips given by the manufacturer. There are slight differences in how transducers are configured, after all (e.g. the position of the screws holes).
Drill a hole to accommodate a screw to hold the transducer in place. Make sure it’s properly positioned as detailed in the manufacturer’s instructions.
Once done, position the transducer then adjust its height accordingly. With that completed, you can now drill holes for the rest of the screws and then tighten them.
Notes:
- When installing a depth finder on a boat with the transducer in mind, keep the screws parallel to each other before tightening them.
- Some transducers come with mouths where you can insert a screw-in bushing so you can easily adjust the transducer’s position. Stick to the manufacturer’s instructions when figuring out how to install and tighten these screws!
- Be extra careful since you’re drilling holes as it’s hard to correct mistakes!
Step 4: Run the cable wires up to the fish finder console
With the transducer installed, it’s time to manage your cables as you run them up to the fish finder unit. Keep your wires neat by using cable ties and zip ties.
Feel free to figure out the best way to run the wire. It could go through any housing for added protection, for instance, or you can run it on the sides.
To wire a fishfinder correctly, stick to the manufacturer’s instructions while using the included diagram as a guide. This way, you’ll be able to route the cables where you need them to be and not be obstructed by other stuff and equipment on your boat.
For example, if you’re trying to wire a Humminbird fish finder, it’s best to just follow the wiring diagram made readily online by the company, like the one above.
Trust me, it’s going to save you time and help avoid needless mistakes. For instance, they’ll likely tell you that wiring a fish finder to switch is important, and they’ll tell you the exact fuse or circuit breaker to use.
- You may have to disassemble parts of your boat to follow a wiring diagram to a tee.
- For multiple fishfinder installation, you may have to create a dedicated subpanel to handle all the connections from the unit to the battery.
- If you’re only trying to hook up a fish finder and nothing else, you can just wire the fish finder unit directly to the battery.
Again, stick solely to what the manufacturer tells you!
Step 5: Mount the fish finder unit
You came to set up a fish finder, and that’s exactly our last step! Your unit may have come with a gimbal bracket, which I’m going to assume you’re going to install on the dashboard.
If that’s the case, I’m assuming you’re installing it behind the steering wheel.
- Position the bracket in such a way that it’s centered and parallel to the wheel.
- Mark the screw holes once you’re done. Don’t drill just yet, though, as I highly suggest you check under the dashboard for any wires you might hit!
- Fasten the screws nice and tight (some units are really heavy, after all). You don’t want your unit to disengage once a big wave hits you, right?
- The unit should be ready for mounting from this point on. Follow the instructions on where to attach the different cables such as the ethernet cable, transducer cable, and power cord. All done!
FAQs
Are fish finders hard to install?
If you have a basic one-unit setup for your sailboat, boat depth finder installation is fairly easy. It only becomes tricky if you need to make up for multiple units by installing a subpanel to accommodate them all or if you have to make adjustments for proper wiring.
These additional steps complicate the usually straightforward process.
Where do you mount a fish finder screen on a boat?
This is a matter of preference. You just have to be mindful of a few rules such as making sure it’s not obstructing your view, and it’s always available within arm’s reach.
The dashboard is a popular mounting spot since you’ll be able to quickly glance at the screen while you’re driving and navigating.
Can you hook a fish finder straight to the battery?
If you’re referring to the boat’s starting battery, yes, nothing is wrong with this setup, and it’s actually fairly common. But we can’t deny that having a dedicated battery for it makes it highly portable and takes the load off the main starting battery.
It would also be easier to identify the wires running from the fish finder and transducer and solve power issues should they arise.
Conclusion
I hope that I’ve given you the important gist of how to install a fish finder on a boat with the steps and guidelines I’ve shared here. Always start by familiarizing yourself with the specific points where you’re going to mount the transducer and fish finder units.
Plan the wiring run and anticipate which parts of the boat will need to be disassembled to make way for them. Lastly, be sure you’re correctly mounting the plates and connecting the wires to their right terminations.

“My intention from the first day establishing Boating Basics Online is to provide as much help as possible for boaters who want to experience a first safe and convenient trip. So feel free to join us and share your beautiful journeys to the sea!”

