
Winterizing a pontoon boat is usually a task that is dreaded by boat owners new and old alike. While it is a long and tedious process, it could still be simple, and that’s how we will approach this whole thing.
In this short guide, we will cover the essential steps to ensure that your precious boat is put away properly and that it gets through the winter in the best possible shape.
Keep reading and see for yourself how to winterize a pontoon boat.
Table of Contents
- What You Need
- Step-by-Step to Winterize a Pontoon Boat
- Step 1. Check your manual for specific instructions
- Step 2. Attach your motor to a water source
- Step 3. Fill your gas tank and add a stabilizer
- Step 4. Change your gear oil
- Step 5. Apply fogging oil to the carburetor
- Step 6. Replace sparkplugs and apply the fogging oil to sockets
- Step 7. Clean the boat
- Step 8. Disconnect the battery and electronics
- Step 9. Cover the boat
- Pro Tips
- Conclusion
What You Need
- Water hose
- Outboard motor flusher – also known as muffs
- Fuel stabilizer
- Marine gear oil
- Gear oil pump
- Fogging oil spray
- Spark plugs – replacement for old ones
- Anti-rust spray (optional)
- Cover for the boat such as a tarp or shrink-wrap
- Cleaning equipment such as brushes
- Vacuum cleaner
- Soap and cleaning agents
- Frame for the cover (optional)
- Polish for boat surfaces and pontoons
- Screwdriver
- Torque wrench
- Replacement fuel/water separator
- Moisture control equipment such as a ventilator (optional)
Step-by-Step to Winterize a Pontoon Boat
Step 1. Check your manual for specific instructions
The first step is to read your owner’s manual and look for a section discussing winterization. They say that knowing is half the battle, and this applies to winterizing pontoon boats as well. Giving the manual a quick read will give you an idea of where to look for whatever information you might need.
It is especially important to see if there are any special instructions regarding how to winterize your pontoon boat and its storage.
Also, prepare your equipment beforehand.
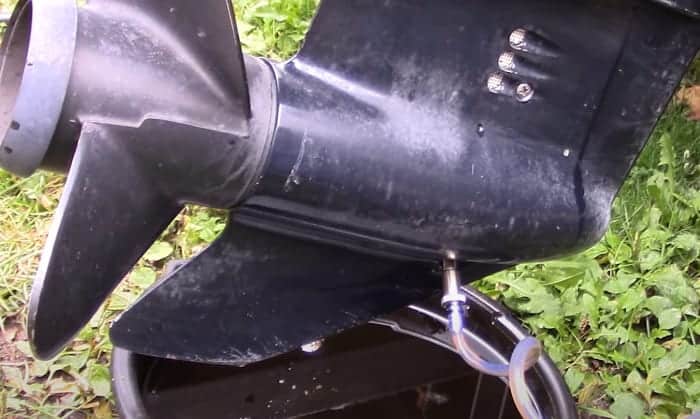
Step 2. Attach your motor to a water source
Place your muffs on the water intake of your motor. Simply clamp them on and secure them properly. Then, connect your water hose to the muffs and then to a water source. Make sure to check that water is flowing properly.
I recommend testing to see that everything is in order before proceeding. Remember always to ensure that water flows into the water intake. Running the engine without water will damage it, so be careful. Keep the engine just above neutral to keep the rpm manageable.
Step 3. Fill your gas tank and add a stabilizer
Now fill the gas tank. You will need to fill it almost entirely; just leave a little space for expansion when the temperature changes. Add the stabilizer, you can add it before or after filling the gas tank. Make sure to read the instructions for the stabilizer for the right proportion.
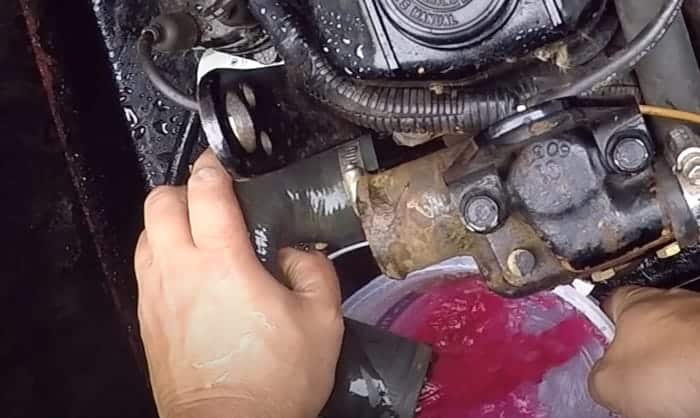
It’s also a good idea to change your fuel/water separator at this point. You can usually find the separator on the side of the stern; refer to your manual for its exact location.
Replacing the separator itself is simple, just turn it until it comes loose. Expect to spill some fuel though. After removing the separator, transfer its contents into a clear container in order to inspect for any particles or debris. If it’s clear, you’re all good.
Place the new separator in and tighten it by hand. Make sure to fill it with fuel first though, or the engine will not work properly. Turn it on and allow it to run for a few minutes to get the stabilizer into the whole system.
Step 4. Change your gear oil
The next step is to change your gear oil. First, remove the oil filler cap to allow the oil to flow out easily. Then look for the oil drain cap and remove it. If you have a bigger motor, consider using a drain tube to make it easier to catch the oil into a container for easy disposal. Raise the motor, then lower it when you’re ready to drain.
After draining the oil, remember to clean the seals and ensure you still have your washer to prevent the oil from draining and keep air and water out. Now attach your pump to the container of your gear oil and start pumping the oil in. Pump oil in until it starts to flow out.
Remember to change oil and replace oil filters regularly to keep things simple.
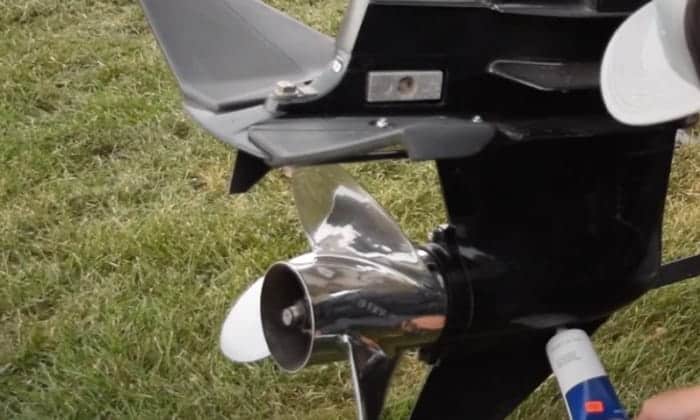
Step 5. Apply fogging oil to the carburetor
Now access your carburetor. Prepare your fogging oil and turn the motor on. When you spray fogging oil into the carburetor, the engine will stall, so apply the fogging oil just a little at a time. We want the fogging oil to cover the inside of the engine and it needs to be running for us to be able to do that.
When you spray the fogging oil in, allow a few seconds for the motor to recover so it doesn’t cut off. Spray it a few times, and that should do the trick. You can also spray more generously to cut it off; that way, all we really need is to spray it a few times while it’s running.
Step 6. Replace sparkplugs and apply the fogging oil to sockets
Remove each spark plug and make sure to get all of them. Use your torque wrench to remove each sparkplug. Then, spray the fogging oil into the sparkplug holes then start the engine.
It won’t hurt to have some fogging oil on the socket points so coat it as well. Apply a bit more fogging oil before placing the new spark plugs.
After placing the new spark plugs, spray the engine block with anti-corrosive spray. It’s the portions that are unpainted that we really want to cover to protect against wear. Cover the engine up once that’s done, and we’re done with it.
Step 7. Clean the boat
The next step is to clean the whole boat. First, clean everything on the boat including carpets and furniture. It will be easier to clean everything sooner because any stain will have set in deeper after winter, not to mention the damage that winter itself can bring.
Also, clean the exterior of the boat, including the pontoons. Applying polish will protect your pontoon tubes as well since most polish products have a protective layer that helps repel corrosion, rust, and dust grime.
If you have some repairs to do on the boat, it’s also better to do them before storage. The winter will make the damage worse so it’s better to fix everything sooner, including repainting jobs.
Step 8. Disconnect the battery and electronics
Remove the battery from the boat. It’s also a good idea to remove electronics from the boat if possible and store them indoors; this goes for the battery as well. Fully charge the battery before storing.
It’s also a good idea to remove items from your storage spaces. Remove flotation devices, boating accessories, trolling motors, fishing equipment, and any other accessories as well.
Step 9. Cover the boat
The final step before storing your pontoon is to cover the boat. Before covering, make sure to go over the entire boat and ensure that everything is dry and free from moisture. The damage from wet areas can be significant. As for your motor, you can raise and lower it several times to get it dry. Leave the motor upright for storage.
Make sure that your cover is made of a durable material that can provide sufficient protection for your boat. It helps to use a frame for your boat cover as it will strengthen the cover and keep the boat better protected. Tarp or shrink-wrap are good choices.
After covering with a tarp or shrink wrapping, bring the boat inside and you’re all set for winter storage.
A pontoon boat covered for storage
Pro Tips
- Put mothballs and pest repellants on the boat to keep undesired guests away
- Consider using items for moisture control such as a mechanical ventilator
- Keep storage compartments open for extra ventilation against moisture
- Regardless of where you keep the motor, always store it upright
- Using pure gasoline for storing a boat helps keep the fuel system in good shape
- For outboard/inboard engines, you should use non toxic antifreeze that is based on propylene glycol
Conclusion
This concludes our guide on how to winterize a pontoon boat. While the winter is a harsh season for boats, knowing you prepped your pontoon boat yourself should give you peace of mind that you were able to protect your investment from cold temperatures.
We hope you found this short guide helpful. Please share it with your friends who might find it useful. Also, do leave your comments below as we would love to hear your thoughts and comments about this guide and winterizing pontoon boats in general.
Stay well and boat safely.

“I am James Harvey – founder of Boating Basics Online. It is established with the drive to help out first-time boaters, which are those desiring to explore their way through the water. So if you are new to boating, start from here with me. “