
Once the wood is waterlogged, it becomes weak, rotten, and eventually useless! Thus, it’s essential to waterproof and seal your boat to face the marine environment, which can sometimes be harsh and damaging.
You must know the correct ways on how to waterproof wood for a boat. Better do it right, or you’ll just waste your hard work, time, and resources. You have to make a proper seal on the wooden surface area through an epoxy coating.
Sanding and painting are other crucial steps in waterproofing wooden boats. I will reveal the correct waterproofing process as you continue reading.
Table of Contents
Preparations On Making Wood Waterproof For A Boat
Boat owners should be particular with the necessary materials and tools as well as every essential step of waterproofing wood. This can be your guide whether you need to refurbish an old boat or make pontoon boats and other wooden vessels.
Collect these things:
- Acetone
- Brush or foam brush
- Clean cloth
- Container for epoxy
- Marine epoxy
- Hairdryer or heat gun
- Paint stick
- Paper towels
- Sanding block
- Sandpaper
- Tack cloth
- Tarp
Steps to Waterproof Wood for a Boat
Step 1: You must have all the materials for waterproofing the wooden boat before you start. Place the essentials in an area where you can easily spot each of them. So, you won’t waste time looking for something.
You’ll also have to manage not messing up the work area, and adding a tarpaulin on the floor will do the trick.
Step 2: The wood must be free from any contaminants like oil, grease, wax, and mold. Use a clean rag or paper towel with some acetone to get rid of the unwanted things.
The cleaning process should be accomplished before you start sanding in respect of preventing more contamination. You have to be cautious as well in handling acetone. I recommend wearing a mask, safety gloves, and working in a ventilated area.
Step 3: To ensure that the epoxy adheres well, you have to apply it on dry wood. In my case, I can shorten the drying time of the surface by using a fan, hairdryer, heat gun, or heat lamp.
When doing this step outside, be aware of temperature changes as condensation can happen.
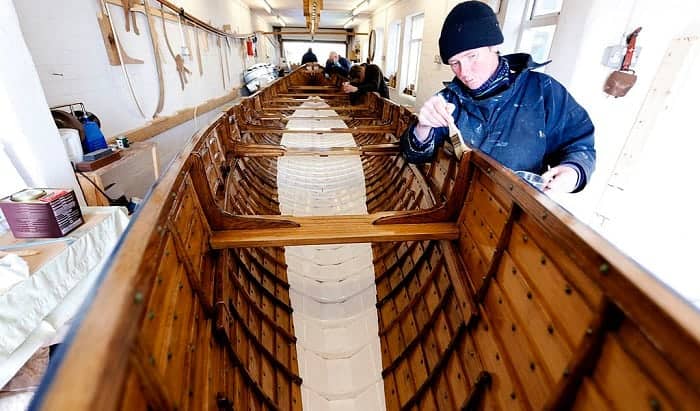
Step 4: I recommend sanding the Marine waterproofing wood for your boat on both sides to eliminate any flaw which can develop into an issue later. A sanding block can make this task easier.
Then, you can start working a rough grit to achieve a smooth finish. You can continue down with finer 80-grit sandpaper. Working this way will prevent deeper holes or gorges from forming.
Sand the surface through a circular motion for an even finish, as this manner doesn’t let you excessively work on a specific section. You also have to tend the edges and corners. Eliminate chalking, blistering, and flaking.
After you’re done with sanding, make sure to clean up and wipe away any speck of contaminant.
Step 5: This part is mixing epoxy resin and hardener. You can find good ones from Pro Marine, TotalBoat, Better Boat, and East Coast. The time frame for drying can be from 16 to 20 hours.
It differs as it depends on the number of layers that you apply. Get a container that you can thoroughly and slowly mix the epoxy and the hardener. Use a paint stick to blend the two substances.
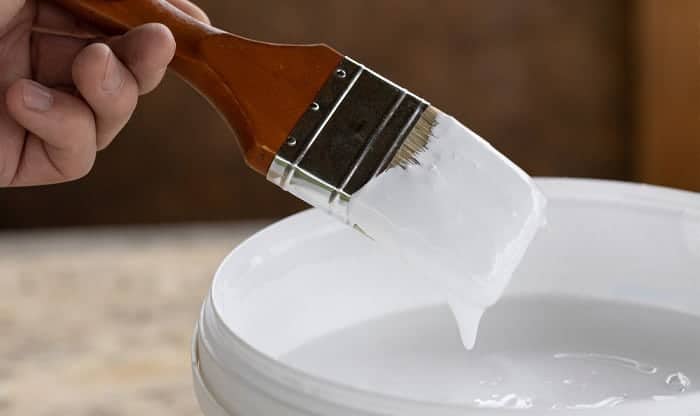
Step 6: When applying the epoxy resin, the tools that you need should be within your reach. Start working in the middle and continue brushing. Let the bristles go through all the nooks and crannies; don’t miss a spot.
The pattern should be applied on the wet layer first, then take the epoxy to the dry side. It’s advisable to begin with a thin coating and make sure that it’s watertight.
Step 7: Once you finish all layers, you have to check for runs. Make each layer consistent for excellent waterproofing. Drying time is ideally done in a dust-free room, so you won’t gain unnecessary particles.
One layer of epoxy is not sufficient. When you have porous wood, the absorption of the epoxy is quick. In this way, you can prevent rot, and pores won’t turn into water channels.
Step 8: When making more layers, you have to lightly sand the previous application working on the next layer. You have to clean in between layers to create an even and smooth coating as well.
The complete curing of the epoxy or boat wood sealer should be in a place with no hint of sunlight. It’s because epoxy is not resistant to UV rays. After the curing process, cleaning is still necessary to free the surface from contaminants.
When it dries, you have to use the solvent to remove the wax coating that develops during curing time. You have to wipe the entire area.
Step 9: Sanding is necessary for the second time. You can begin with 10-grit sandpaper, then continue downwards with 150 – 220 grit. A light sanding is excellent on edges and corners to not accidentally ruin the epoxy layers.
This process will wipe away shiny coating that can prevent the epoxy from bonding properly. What happens is that the water turns into beads, and the epoxy will have a hard time adhering.
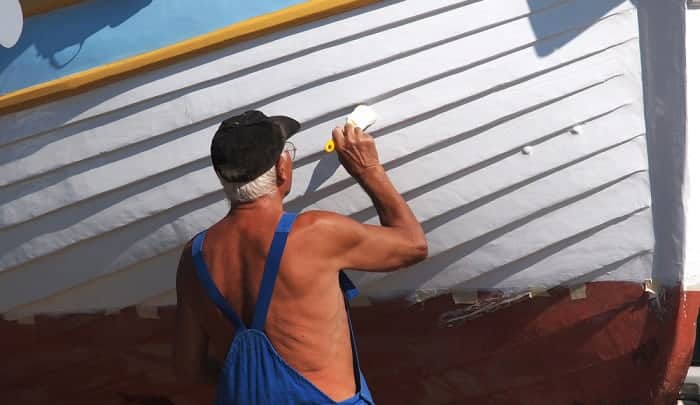
Step 10: You can get creative in this part when you start applying waterproof paint for the wood boat. Planning is great to impede potential issues. Usually, four coats of the best paint are needed to shield the epoxy from the sunlight and keep its solid color.
Give the paint enough time to dry between coats so you can obtain a smooth finish. Inspect for any runs and don’t allow them to turn dry. If you see one, wipe right away, or else you will need to sand again.
I recommend getting waterproof paints like SEAL-ONCE Marine Premium Wood Sealer, Liquid Rubber Sealant, and TotalBoat Wet Edge Marine Topside Paint.
Waterproofing your wood boat with these steps ensures protection from direct contact with water. You won’t hesitate to go out with your wooden boat, even on a rainy day.
Some Tips When Waterproofing Wood For A Boat
Getting the Ideal Wood
First and foremost, you have to pick the ideal wood among other materials before waterproofing wood. It’s an advantage on your side as it will be easier for you once you’ve secured it.
Marine plywood is the most ideal for this project. It’s not just ordinary plywood as it’s made tough in facing hurdles and harsh conditions. You’ll be amazed to find that marine plywood is ten times thicker than regular plywood which usually has 3 to 5 layers.
Since the glue for binding the layers is substantial enough to resist water, it’s also labeled as waterproofing plywood. Furthermore, longevity is guaranteed.
Selecting the Waterproofing Epoxy and Sealer
The epoxy and sealer are extremely important when waterproofing plywood or some kind of wood. You’ll find a wide variety in the market. However, you have to select the one compatible with your application, so it is not bothered by issues later on.
Epoxy
Epoxy systems are made for wooden boats that follow after the West system. It has a wood epoxy saturation that paves the way to proper absorption of epoxy into the pores and grain. This is how it creates a barrier.
I recommend the Marine epoxy as it doesn’t have thinners and organic solvents, which you should avoid as its molecules are bigger than ones found in the water. These organic molecules can destroy the waterproofing layer as it forms tiny microscopic tunnels when the epoxy turns dry.
Sealer
A marine sealer generates a watertight and airtight seal, and it can contain silicone, polyurethane, and polysulfide. It can protect surfaces like marine plywood and other kinds of wood.
Boaters use this to properly seal two or more surfaces and even those with mechanical fasteners. Choosing the right one will depend on the material and areas to be sealed that can be below and above the waterline.
You can use polysulfide for almost everything. On the other hand, polyurethane is for binding materials that don’t need to be separated. Lastly, silicone is for insulating non-similar metals and beds in plastic.
Think of safety and necessary instructions before you start sealing. The time needed for the curing process varies but expect a longer time for the strongest sealant. Also, you may need to know if you can easily remove it on your skin after contact.
Manufacturers provide instructions for removal and clean-up. You may need substances like acetone, mineral spirit, or kerosene.
Waterproofing Wood for Boat Done!
Once you understand every step on how to waterproof wood for a boat, you’ll realize that it’s not complex. All it requires is patience and time. Then, you will be rewarded with a waterproof and pristine finish.
All your effort won’t only pay off with a waterproof surface for marine use. You’ll be able to create a coat that can counter long-term damage to prolong the lifespan as well.
Did you like this guide? If you want to find more tutorials like that, you can check them here!

“I am James Harvey – founder of Boating Basics Online. It is established with the drive to help out first-time boaters, which are those desiring to explore their way through the water. So if you are new to boating, start from here with me. “