
Being able to paint a Jon boat that you own, or any marine vessel for that matter, not only helps you save money but can also be pretty fulfilling. That being said, it does require a bit of technical know-how, particularly when handling power tools.
Feel free to use this as a guide on the entire process. I’ve included instructions on how to prep for an aluminum Jon boat paint job and how to paint an aluminum Jon boat.
Table of Contents
Prepare The Things You’ll Need
When you prep an aluminum boat for paint, you’ll need tools for stripping and priming your vessel. For this, I use:
- Paint and varnish stripping gel
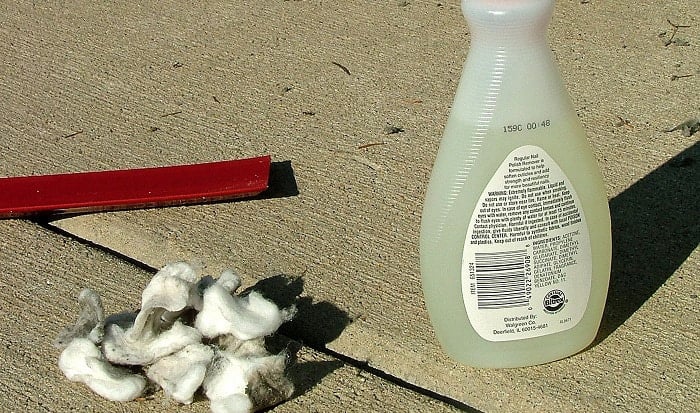
- Paint and varnish remover spray
- Plastic putty knife
- Self-etching primer
- Pressure washer
- Acetone
- Clean towel or cloth
Otherwise, you can opt for sandpaper or a sanding tool. For this, you’ll want to have:
- 120-grit/220-grit sandpaper and sander
- Angle grinder
For the actual painting, I usually use:
- Any marine-friendly coating spray or oil-based camo spray paint
- Thinner
- Truck bed liner
- Painter’s tape
- Spray gun
- Tack cloth
How To Prep An Aluminum Jon Boat For Painting
If you want to put in minimal effort, I suggest choosing the paint and varnish remover spray from reliable brands like Citristrip. I often can skip brushing or rolling when I use it. I also don’t have to make sure it’s evenly applied because it self-levels on the surface.
Anyway, this is how I usually go about with the prep work:
Step 1. Spray or Apply the Paint Remover
Whether you use the spray or the stripping gel, you’ll need to make sure that it’s evenly applied so it strips all the old paint. Typically, when I use Citristrip’s spray, I only need to wait from 50 minutes to an hour before the paint starts bubbling and peeling. I generally apply two coats.
You can always leave it on for 24 hours, as recommended by the brand. However, if you feel it’s starting to go off, then there’s no use waiting that long.
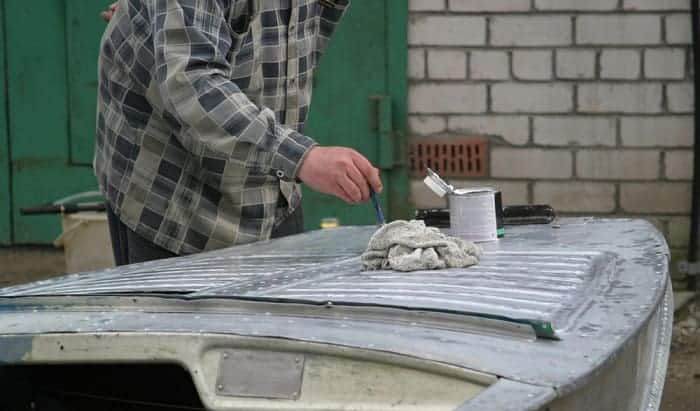
Step 2. Scrape, Sand Then Wash Off the Remaining Residue
Now, use the plastic putty knife to scrape off any old paint that persists on the surface. I use plastic to make sure I don’t damage the aluminum. Alternatively, you can opt for 120-grit sandpaper with a sanding tool to smoothen and clean up the surface.
If you can use a pressure washer to dislodge the rest of the paint along with the debris, then that’s fine too. For easy cleaning, it’s good to lay out a plastic cover below your vessel to catch the residue once you hit it with the pressure washer.
Step 3. Wipe the Metal Surface with Acetone Then Spray the Primer
Once you’ve bared all the metal, use acetone to clean it further. You can wet a towel with acetone or drip a bit on the surface. Then, proceed to wipe it with the cloth. It’s your choice.
The technique I use is I wipe every section of the acetone then spray the primer on it. Depending on how big your vessel is, this should last a few minutes to a few hours.
Prepping Using Only Sandpaper And A Sander
It typically takes more time, so I seldom do it. If you’re going down this route, 120-grit is a good starting point for most aluminum boats. To me, it’s better to start with that then move up to 220-grit or even 320-grit.
How To Paint An Aluminum Jon Boat
When painting an aluminum boat, you have to be mindful of overpainting. I usually rely on a truck bed liner for this. You can also use any applicable cover that temporarily adheres on the vessel so it won’t get splattered or sprayed.
With that out of the way, it’s now time to apply your aluminum boat paint.
Step 1. Spray the Bottom of the Boat
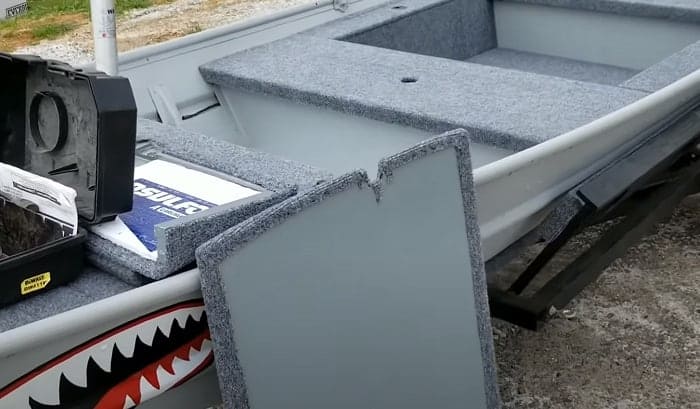
Attach the liner on the sides to mitigate overpainting. Begin spraying the paint of your choice onto the surface. Spraying is pretty much straightforward, and you only need to wait for the entire bottom to dry before proceeding with other sections.
I prefer to use Rust-Oleum’s coat spray since it’s cheaper and easy to apply. It spreads evenly and has an excellent overall coverage. I can get most painting jobs done with just six cans.
Step 2. Turn the Boat Over, then Place the Bed Liner Below It
Once the boat’s bottom has dried, you can turn it over and put a bed liner at the bottom. The bed liner ensures that the boat’s bottom won’t be subjected to abrasions or scratches that might damage the fresh paint. You can choose to apply an automotive primer before painting the other sections.
Step 3. Clean with Tack Cloth and Start Thinning the Paint
The wait involves the bottom paint, which would more than likely have caused dust and debris to settle on the surface. You can use a tack cloth to clean it before applying a fresh coat of paint.
Of course, you’d have to prepare it before applying, and this is unique to the paint product you’re using.
Since I’m using oil-based paint and a spray gun, I need to apply 10% thinner to it, depending on how much I use. On the whole, it needs the appropriate consistency to be smoothly applied using a spray gun.
Step 4. Start Spraying!
Set your spray gun up properly. Place an adequate amount of paint in it; be careful not to exceed its maximum capacity. You may need to cover your nose with a cloth before spraying, especially if the odor is strong.
Be mindful of your angles so you don’t end up with paint rebounding towards you or spots in place you don’t want them to be. Much like applying the primer, you solely need to ensure that the final coating is even and adequately thick.
One last tip: Plan the day that you’re going to paint your boat. A nice, clear day with a considerably low chance of rain and wind is perfect. You don’t want bits of wood, rocks, or other particulates that can be carried by the wind landing on your stellar finish, after all.
Conclusion
What did you think of my tutorial on how to paint an aluminum jon boat? Did you like it? I offered this method because it’s the one that has given me consistent results. It promises a finish that looks almost professional and saves me time and effort. If you agree or disagree with my method, please share why in the comments! I’d love to hear your version if you’re willing to share it!

“I am James Harvey – founder of Boating Basics Online. It is established with the drive to help out first-time boaters, which are those desiring to explore their way through the water. So if you are new to boating, start from here with me. “