
Are you planning a DIY jon boat project but don’t know how to build a jon boat? You probably already know that it’s way cheaper to construct, even with the cost of homemade jon boat plans considered. But what if you have time constraints?
Regardless of whether you’re following more generalized wooden jon boat plans or more specific plywood jon boat plans, it’s always safe to start from the floor. The bow, prow, sides, and transom follow suit. Once done, only then should you start on parts above the deck. This can be done in at least two days, as our guide proves.
Table of Contents
List Of Required Tools And Materials

Flat bottom plywood boat plans typically require you to have these tools. Take note that this list doesn’t take into account any customizations or accessories you choose to add to your jon boat.
- ⅝ Plywood (marine-grade, carpet-covered, and pressure-treated are recommended)
- A miter saw, electric hand saw, or table saw
- Clamps
- Compass
- Flexible ruler
- Pencil
- Screws and electric screwdriver
- Glue (gorilla glue is recommended)
- Power sander
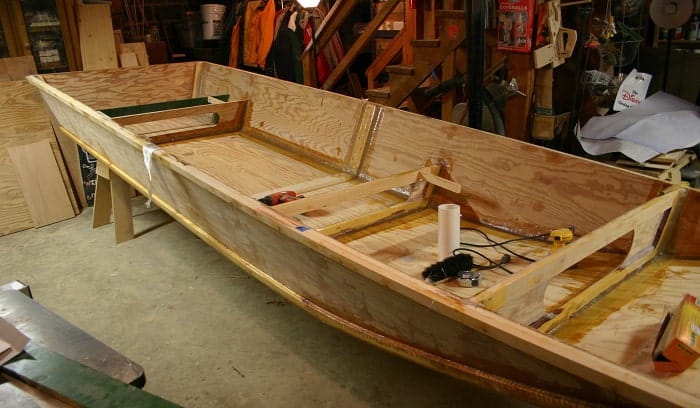
Steps to Build a Jon Boat: Detailed Instructions
Step 1: Creating the Floor or Bottom
- Set the first plywood base or floor down. This is assuming you’ve cut it down to the exact size you want (e.g. 48” x 42”). Measure the offset at the front of the boat. It should be at least 3 inches at the front. Afterward, measure a distance of 24 inches from it then put a 1-inch winch offset at that mark. Use a flexible ruler to draw the offset line.
- Following the line you drew, begin cutting wood with an electric hand saw or any applicable tool for the purpose. Mark the area where you’ll be setting the rails using a pencil from the front to the first piece of plywood on both sides. 3/4 of an inch for the offset is recommended but you can always make some minor adjustments.
Step 2: Setting the Bottom Rails and First Cleat Board
- Set the rails in place with a clamp while using the marking you’ve drawn. They should be placed on the edge but next to the line on the interior side. Secure them with screws, whose positions should be used as references for where you’ll put the glue later. A distance of 6 to 8 inches per screw should suffice.
- Trace the length of the rails with the pencil again to mark them. Now attach the second piece of plywood at the back, taking great care for it to have the same measurements as the first plywood. Take note of the ¾ overhang you did in the first plywood when setting it up, it should be the same as the second plywood.
- Mark the rails on the second plywood. The rails should accommodate a ¾ reveal where you’ll be setting the front board for the bow later. Place screws on the second plywood like you did in the first one. Once done, you can start on the cleat board that will bind the two plywoods together. Its length should be the exact distance between the rails, with a width that is adequate to cover the two plywoods. Screw the two pieces together through the cleat board.
- Now you can start unscrewing the rails. Wipe the areas where you placed them with a clean wet cloth to remove any dust and debris. Dampening the joints also improves the glue’s adhesion to the wood. With this step done, you can now start with the gluing process.
Step 3: Glue then Screw
- Make sure the glue run is uninterrupted while you’re applying and don’t go over your marking lines. The former is to make sure no water seeps into the space between the rails and base plywood. Next, it’s now time to replace the rails. It’s better if you have someone to help you in this step because you’ll need to place them on the exact screw holes you created earlier. Wipe away any excess glue that seeps out as you set the rails in place.
- Do the same process for the cleat board you placed. Now set a piece of wood at least 4” thick under the front of the boat for it to assume an arching position. This will be in place as you wait for the glue to dry for at least 8 hours. You’ll also need to mark the second cleat board by placing a wood that is just as thick on the spot where you intend to put it. Weigh the wood down slightly to encourage the arching.
Step 4: Time for the Sides and Seats
- This next step can be done the following day. Place the second cleat on the back of the boat with the same steps before. Once finished, you can now start placing the sides on the offsets you marked at the edges. Regardless of the design and arches you choose, always dry-fit it first so you can make any corrections in the measurements. Place the glue then use a clamp as you’re setting the sides to help secure them. Just like earlier, wipe away any excess glue that foams out.
- It’s now time to work on the seats. Glue upright boards with measurements of, for example, 13 ½ x 7 1/2 inch on the sides of the backmost portion of the boat. These will serve as vertical cleats for the back seat. You can now glue the transom next to the boards after doing this. It should fit the entire distance between the two sides. The same goes for the bow and prow. Again, dry-fit it to make sure and make adjustments when necessary before gluing then screwing the transom in place.
- Place two cleat boards that will run horizontally and between the two other vertical cleats, you set up earlier. With that done, you can now put the plywood for the seat. Same attachment process as before: glue then screw. This same step applies to any other seats you add to the boat. With that out of the way, turn the boat over then start attaching four oak (preferably) rails that will help prevent abrasions from jagged rocks or other debris you encounter while boating.
Step 5: Cleaning, Customizations, and Finishing Touches
- From here on, you can start doing most of the customizations and finishings you intend to do. You can add handles at the front and back, for example, to boost safety and stability when riding or embarking and disembarking. Take the time to sand and clean the boat of excess glue foam and dust. Got screws protrude at the sides and bottom?
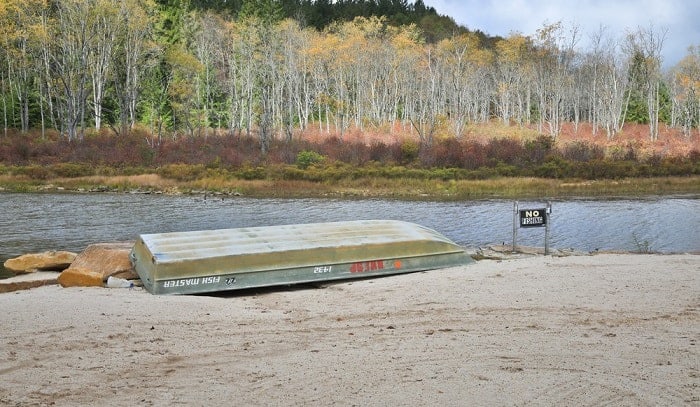
A Note About Weight Capacity
Remember that your boat’s size is directly proportional to its weight capacity. A 20-footer is expected to handle at most 1,800 pounds, while a 16-foot one has close to half of that at only 990 pounds. Don’t lose sight of your requirements when considering the weight. Because what’s the use of upsizing if the finished boat won’t fit in your trailer?
Conclusion
Were you satisfied with the instructions on how to build a jon boat we shared here? I always go back to this basic guide whenever I need to build a jon boat from scratch. It beats most plans out there for how uncomplicated and quickly it can be done. Do you agree with me? Please share your thoughts below!

“I am James Harvey – founder of Boating Basics Online. It is established with the drive to help out first-time boaters, which are those desiring to explore their way through the water. So if you are new to boating, start from here with me. “