
DIY projects allow you to achieve the result that you desire. Utilizing your skills and artistic talents is related to this matter, and it’s also a way to save some bucks. With regards to this, many boaters can manage how to build a boat bench seat by themselves.
You may have wood for building boat seats. Some upgrades can be done by adding cushion and vinyl. Once you choose a design, you can start collecting materials.
If you’re groping for design ideas, this article will show you DIY boat bench seats that will surely please you. You can follow them to refurbish or renovate a boat.
Table of Contents
How to Build a Boat Bench Seat? (Wooden Banquette)

Various boat styles showcase different angles and lines. Wide and deep hulls are the main characteristics of workboats, while sailboats are thin and long. Nonetheless, a wooden banquette would be fantastic on both of these vessels. Here are the steps:
- Step 1. Take off Metal and Trim
A banquette is a bench along the wall. Therefore, you have to consider the needed space and shape for it. The center section of the boat is where you need to lay down this project.
To get started, you have to remove metal or trim but you must keep the pieces for reconnection later on. You may also need to take off logos and insignias that are still useful.
- Step 2. Cutting the Chosen Area
Use chalk to draw a line on your chosen area then you can run the chainsaw over it. Cutting the area should be even and consistent. You may need to tidy up the cutting with a circular saw.
You have to be attentive while doing it as there may be some screws. These tiny pieces of hardware may be hiding underwood plugs.
- Step 3. Cleaning
Get rid of the debris created by cutting since it can block from cutting the bottom part.
- Step 4. The Bench Base
Use two pieces of 2×4 wood and place them 16 inches above the boat’s floor with the support from screws for wood. This step is not only for building the base but hull reinforcement as well.
Get ¾-inch plywood to be added over the 2×4 woods with screws. This will strengthen the structural integrity that may have temporarily gone due to the cuttings that were made.
- Step 5. Seat Back
You may recycle some wood that just lay around or V-groove soffit panels. Get measurement from the seat to the boat’s top for the preparation of the seatback.
To ensure that you’re going to create comfortable seats, add horizontal wood blocks that tilt at a slight angle. Install the seatback with 15-gauge finish nails.
- Step 6. Seat Attachment
You may choose any suitable wood for the seat. Mahogany and tropical hardwoods like ipe are the best examples. Pre-drilled screw holes should be done before assembling the parts. Make planks for the bench size that you like and fasten them with stainless wood screws.
- Step 7. Painting the Banquette
If you use recycled wood with some paint on it, you need to sand it before applying a new coat.
- Step 8. The Last Touch for Refinement
You have to add a routed edge over the wooden seat. Then, you can put back the metal and insignia that you removed when starting this project.
The finishing touches will be covering the back panels with new paint, applying oil on the wood to have an attractive sheen, and sealing the original parts with polyurethane.
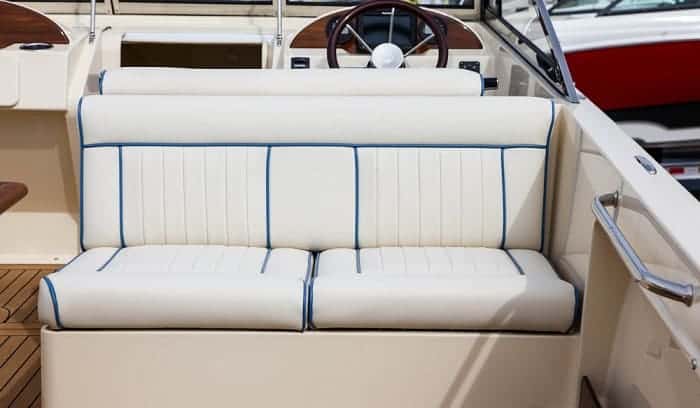
Cushioned And Vinyl-covered Boat Bench
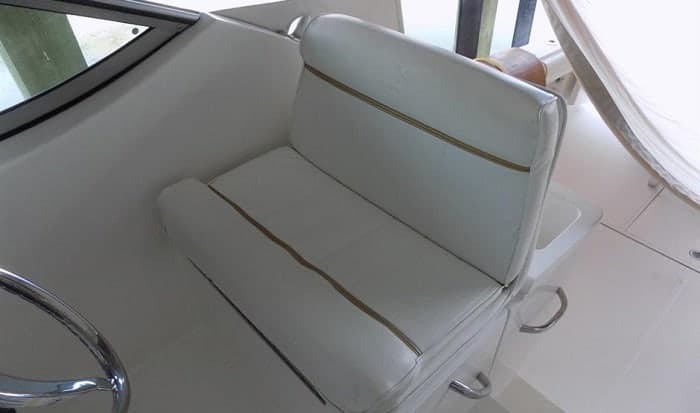
When thinking of comfortable bench seats for boats, cushions and vinyl may be the first things that come into your mind. You can skip buying ones for your aluminum boat and instead, make them yourself for customization.
So, here’s a guide on how to make a boat rear bench seat if you don’t mind sewing some seat cover.
Materials and Tools to Collect:
- Marine vinyl
- Marine thread
- Ballpoint needles (16 or 18 gauge)
- Foam
- Pre-made cording
- Plywood (for bases)
- Paint for the plywood
- Double-sided tape
- Staple gun and stainless staples
- Scissors
- Circular saw
- Electric carving knife
- Sander
- Measuring tape
- Zipper foot for sewing machine
Steps to Follow:
- Step 1. Rectangular Box Frame
Making a rectangular box frame is the very first step. Make three sides for the lower portion, and they will touch the transom and the floor. Its top will be able to flip and access the engine.
Make some plywood strips based on the measurement of the bench seat. You may have a shop cut it for you. Some 1”x1.5” pressure treated lumber, waterproof wood glue, and 1” staples are the things that you need to put the pieces together.
After forming the box out of the plywood strips, get rid of splinters by sanding. This process can also break the edges to prevent damaging the vinyl. After sanding, you can apply two coatings of paint.
Once the glue has dried, place it on the designated area in your boat. It’s sturdy and it won’t give you problems.
- Step 2. Setting the Vinyl Down
You don’t have to put vinyl at the bottom of the box. An extra piece is needed to be wrapped under the seat. Just apply more effort in working for a nice appearance and allow a vinyl skirt to hang.
Make sure to leave a margin of about half an inch for sewing the edges. This is enough to match the cording’s size. Use the double-sided tape to hold the cording and make it curved without twisting or binding.
If you know how to use the sewing machine, you’ll be fine. But if not, you can ask someone to do it for you. When vinyl is sewn properly, you can install the bench.
- Step 3. Cutting the Foam
Measure the amount of foam that you need, then mark it. Cutting can be done with an electric knife. Give ½” extra to ensure that the vinyl cushion is stuffed nicely. When you have the right piece of foam, glue it on the top of the box.
Batting should be added on the sides for some cushioning with the roughly estimated size. It gives the seat a fuller look. Use a Loctite adhesive to glue it and trimming is needed once it sits in the right place.
- Step 4. Adding the Vinyl by Stapling
Stapling creates a serious grip and adequate strength to hold the vinyl in place. It’s best to use stainless staples. You can begin on the opposing side and work your way to finish tucking the whole piece of vinyl.
Just keep pulling, stapling, and tucking to obtain a neat result. At this point, you have finished a bench seat or a motor box for your aluminum boat.
DIY Your Boat Bench Seat!
As long as you have time, resources, and willingness to work, there’s no reason that you won’t try following the steps on how to build a boat bench seat. You can choose the color, design, size, and materials that you like from these two guides.
Some boaters want to customize the looks of their boats to represent their personalities. No one is stopping you from doing so! It can be a technique to give life to an old boat. Also, you can always make a bench seat in a set-up that brings comfort.
Did you find this article helpful? If yes, share with anyone who would need this.

“I am James Harvey – founder of Boating Basics Online. It is established with the drive to help out first-time boaters, which are those desiring to explore their way through the water. So if you are new to boating, start from here with me. “