Better understand how to charge a boat battery on the water when you’re cruising waters. It’s best that way, especially when you’re fishing or resting in the sun and your boat stops working.
Check that the engine is in good working order, as well as the battery. It will surely make your boating experience worthwhile.
Prior to your boating plans, ensure to avoid any tendency to charge a boat battery without a charger. You’ll learn to charge trolling motor batteries while on a lake on this article.
Table of Contents
Safety Suggestions When Charging A Battery On Lake
You’re probably aware that a boat battery is composed of potentially hazardous components. To guarantee your safety when charging a marine battery, follow these safety suggestions to guide your charging process.
- Use hand gloves and goggles whenever handling your boat batteries.
- Secure and charge your boat battery in a well-ventilated area.
- Ensure to switch off the engine before disconnecting and reconnecting your boat battery.
- Check and test your battery, especially when you have been using it for a long while. You should know that your battery is able to maintain or gain an electric charge.
- Keep reading and learning for possible motor upgrades that can help ease battery charging even as you are navigating through the waters. If you have an outboard or complex motor, check with a professional to prevent damaging your battery.
- Allow your boat battery to cool down or switch it off quickly when it becomes too hot during charging. It is best to defrost your battery before charging it when used during winter or in case it is frozen.
- Don’t forget to read the charger’s instruction booklet to check for precautions and avoid mischarging your boat battery.
Five Easy Steps To Charge Your Boat Battery
Step 1. Examine the battery thoroughly
You need to know what battery type your boat has by thoroughly inspecting the battery. Usually, your battery is hidden in a dark corner of your marine boat that you can’t readily access—leaving the boat battery often exposed to dirt, dust, and trash.
That is why it is essential to inspect and clean it properly prior to recharging your boat battery. Begin the quality check, switch the power off, grab your battery, and take the battery out of its box carefully. Then inspect the battery’s wires and electrical connectors for corrosion and dirt, and clean them if there are any. This way, it will tidy your battery and is now ready for charging.
Pro tip: Inspect the battery terminal connections on a regular basis to ensure they are secure and free of corrosion. Nylon locking nuts are considerably less prone to come free.
Step 2. Choose the Charger that fits
It’s time to get the appropriate charger for your boat’s battery. Using the incorrect one can harm the battery.
In the case of wet cell batteries, using a good lead-acid type charger is a good fit. It will enable you a quick and convenient battery charging. If your boat has an AGM battery, it is best to use a clever multi-stage type charger instead.
This kind of charger prevents damage to the battery in case of overcharging. Meanwhile, a three-stage type charger that includes phase, bulk, and float phase is known as a multi-stage type charger. A multi-stage charger for quick and complete battery charging without the risk of overcharging.
As a result, a three-stage charger for batteries works to extend the life of your battery. It also increases its capacity, reduces the risk of losing electrolytes, and improves the frequency of use for longer boating trips.
Pro Tip: Use a maintenance-type battery charger to maintain the battery fully charged between excursions if you rarely use your boat.
Step 3. Connect the charger to the battery
Now, it’s time to charge your battery by connecting the proper charger to it. To begin, attach the charger clips to your boat battery’s terminals.
After you’ve confirmed that the clips are attached, turn on the battery and replace it. If you have a smart battery charger, you can check the LED display. You can see whether the battery is charging properly until it’s full, and you can proceed to the next step.
Pro Tip: The battery should be on a decent battery tray with a fastened base or attached to the boat and either a strong frame or a locking belt to keep the marine battery in place. Because In rough seas, you don’t want the battery to smash about.
Step 4. Remove the charger from the system
When you see that your boat’s battery is completely charged, turn it off immediately and detach the charger’s clips from the battery terminals. Check the battery charger as you check your battery so you can use them ready whenever you need to.
After that, mount the battery in its original location. But, before you do that, remember to replace the top cover on the containment box too. Another tip for your outboard motor is to charge it whenever you can between uses and remove your charger.
Always make it a routine to check that your battery is on a full charge level every day. When you’ve completed everything, it’s time to go boating and have fun!
Pro Tip: Put the batteries on a battery maintainer/charger during the off-season to keep them in good shape. Otherwise, take the batteries off the boat and put them somewhere where they can be charged regularly.
Step 5. Charge your boat battery with a solar charger
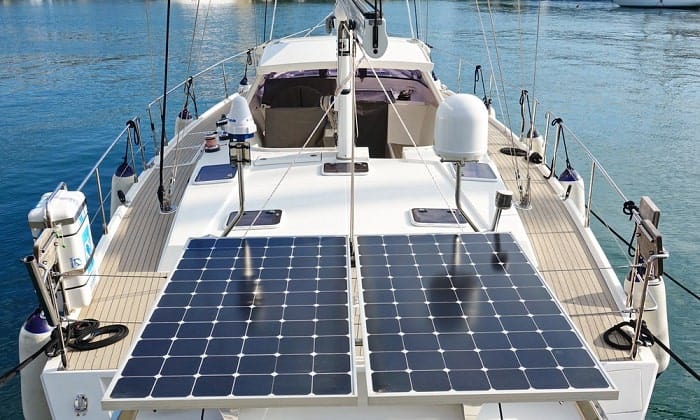
You can also keep your boat battery topped up using a solar charger with photovoltaic panels. Better understand how solar panels can charge batteries on a do it yourself (DIY) approach.
Check that you’re not plugged-in as solar chargers can produce enough charge to power your motors more than it needs. Get your basic tools like screwdrivers, wrenches, wire crimping, drill motor and bits, cutting tools and your solar charger set.
Solar chargers can reduce your fuel consumption while making worthwhile boating trips and increase your DIY skills level. Learn more with this DIY Video on “Charging With Solar Panels“ project series by Chuck Hawley and Kevin Osborn of West Marine.
Last Thoughts
Now, you are ready to charge your boat’s battery even while you’re on the water. What do you think? Using this tutorial will make it an easy task, right?
It will be much easier for you if the battery shuts down, you can do it quickly following each step in order. Then you’ll see that everything is functional, a smooth and enjoyable boating experience. It will guarantee your safety and extend the life of your battery.
So, do you find this tutorial on how to charge a boat battery on the water helpful? If yes, let us know in the comments and feel free to share it with anyone who may need this. Besides, if you have interesting with ways to winterize an outboard boat motor, you can check it out here.

“I am James Harvey – founder of Boating Basics Online. It is established with the drive to help out first-time boaters, which are those desiring to explore their way through the water. So if you are new to boating, start from here with me. “


